Create PWA from website
A Progressive Web App (PWA) is built on web technology, providing users with experience similar to native apps [1]. In this article, I am going to show you how to create a PWA in a straightforward way. First, let's examine how the project structure will appear.
Project structure
Your PWA folder structure should look like the example below:
.
├── assets
│   ├── images
│   │   ├── android-chrome-192x192.png
│   │   ├── android-chrome-512x512.png
│   │   ├── apple-touch-icon.png
│   │   ├── favicon-16x16.png
│   │   ├── favicon-32x32.png
│   │   ├── favicon.ico
│   │   └── tux.svg
│   ├── script.js
│   └── style.css
├── index.html
├── manifest.json
└── serviceWorker.js

2 directories, 11 files
Create index.html
<!DOCTYPE html>
<html lang="en">
<head>
    <meta charset="UTF-8">
    <title>Hello World</title>

    <!-- css -->
    <link rel="stylesheet" href="assets/style.css">
</head>
<body>
    <div>
        <h1>Hello World</h1>
        <p>How are you?</p>
        <img src="assets/images/tux.svg" alt="Tux"/>
    </div>

    <!-- script -->
    <script src="assets/script.js"></script>
</body>

</html>
Create assets
For simplicity, create two files inside the assets folder:
- style.css
- script.js
Paste the following CSS code into style.css:
h1 {
    color: #12ff12;
}

p {
    color: #fff;
}

body {
    display: flex;
    justify-content: center;
    align-items: center;
    text-align: center;
    height: 100%;
    background: #2c2c2c;
}
For script.js, paste the following JavaScript code:
'use strict';

window.addEventListener('load', () => {
    if ('serviceWorker' in navigator) {
        navigator.serviceWorker
            .register('./serviceWorker.js')
            .then(registration => {
                console.log('Service Worker registered with scope:', registration.scope);
            })
            .catch(error => {
                console.error('Service Worker registration failed:', error);
            });
    }
});
*This script ensures that, when the webpage is loaded, it registers a service worker.
Icons
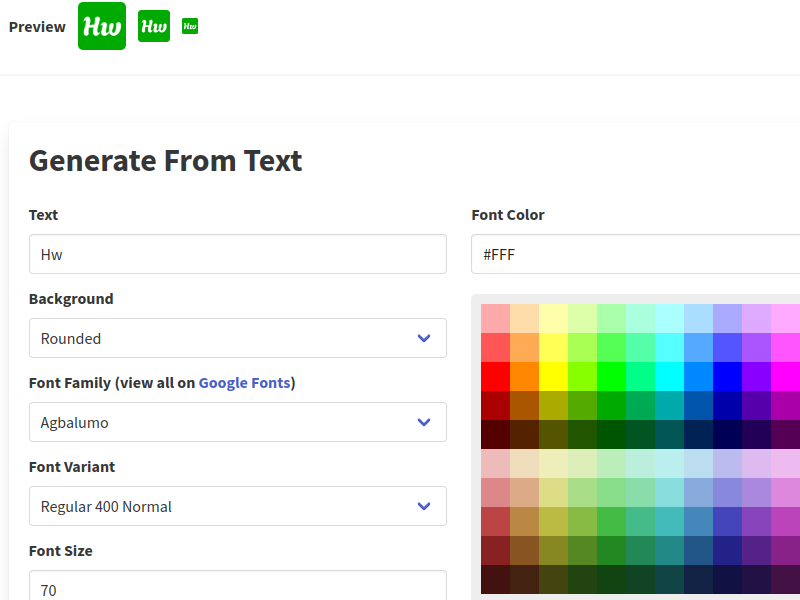
For simplicity, I will use favicon.io to generate icons.
Put all the downloaded .png into assets/images/ folder:
.
├── assets
│   ├── images
│   │   ├── android-chrome-192x192.png
│   │   ├── android-chrome-512x512.png
│   │   ├── apple-touch-icon.png
│   │   ├── favicon-16x16.png
│   │   ├── favicon-32x32.png
│   │   └── favicon.ico
...
manifest.json
Create manifest.json in the root as below:
{
    "name": "Hello World App",
    "short_name": "HWA",
    "background_color": "white",
    "theme_color": "white",
    "description": "Hello World App - Example of PWA.",
    "icons": [
        {
            "src": "assets/images/android-chrome-192x192.png",
            "sizes": "192x192",
            "type": "image/png"
        },
        {
            "src": "assets/images/android-chrome-512x512.png",
            "sizes": "512x512",
            "type": "image/png",
            "purpose": "maskable"
        }
    ],
    "lang": "en-US",
    "start_url": "./index.html",
    "display": "standalone"
}
*The manifest file provides metadata and configuration details about the PWA.
serviceWorker.js
Create serviceWorker.js in the root as well:
let APP = 'cybersecurity-glossary-v1';

let ASSETS = [
    './',
    './index.html',
    './assets/script.js',
    './assets/style.css'
]

/**
 * Start the service and cache ASSETS.
 */
self.addEventListener('install', installEvent => {
    installEvent.waitUntil(caches.open(APP).then(cache => {
        cache.addAll(ASSETS)
    }))
});

/**
 * For offline mode
 */
self.addEventListener("fetch", fetchEvent => {
    fetchEvent.respondWith(caches.match(fetchEvent.request).then(res => {
        return res || fetch(fetchEvent.request)
    }))
});
*The service worker script here is designed to cache specified assets during installation, thereby providing offline functionality to the users.
Update index.html
Now, update the index.html inside <head> tag with the following code :
<head>
    ...
    <link rel="manifest" href="manifest.json">

    <meta name="viewport" content="width=device-width, initial-scale=1">
    <meta name="description" content="Hello World App">
    <meta name="keywords" content="PWA">
    <meta name="author" content="www.amaharjan.de">

    <meta name="theme-color" content="white" />
    <meta name="apple-mobile-web-app-capable" content="yes">
    <meta name="apple-mobile-web-app-status-bar-style" content="black">
    <meta name="apple-mobile-web-app-title" content="Hello World App">
    <meta name="msapplication-TileImage" content="assets/images/android-chrome-192x192.png">
    <meta name="msapplication-TileColor" content="#FFFFFF">

    <!-- Favicons -->
    <link rel="apple-touch-icon" sizes="120x120" href="assets/images/apple-touch-icon.png">
    <link rel="icon" type="image/png" sizes="32x32" href="assets/images/favicon-32x32.png">
    <link rel="icon" type="image/png" sizes="16x16" href="assets/images/favicon-16x16.png">
    <link rel="icon" href="assets/images/favicon.ico" type="image/x-icon" />

    <!-- css -->
    ...
</head>
Serve index.html
Now, we need to serve index.html on a web server. The easiest way to do this is through Python, as shown below:
$ python3 -m http.server
Serving HTTP on 0.0.0.0 port 8000 (http://0.0.0.0:8000/) ...
Browse http://0.0.0.0:8000 in Chrome. The app should be up and running.
Lighthouse
Finally, let's analyze the page load using Chrome's Lighthouse:
- Navigate to
0.0.0.0:8000 - Right-click and select Inspect
- Go to the Lighthouse tab
- Click on Analyze page load
Awesome! You've successfully created a Progressive Web App (PWA)!
Conclusion
Creating a PWA from your existing website is a straightforward process that significantly enhances the user experience (UX) by providing app-like features. Follow the steps outlined above to build your own PWA, and share your experience in the comments section below.
Articles recommended by the author
References
[1] “Progressive web apps,” MDN Web Docs. https://developer.mozilla.org/en-US/docs/Web/Progressive_web_apps (accessed Jan. 14, 2024).