This article shows you step-by-step SAP Identity Management installation tutorial on Windows Server 2022 and MS SQL 2019. For a detailed reference, refer to the official documentation.
Software requirements
Here are the software requirements needed to follow this tutorial.
| Software | Version |
|---|---|
| Windows Server | 2022 (Any desktop experience version) |
| Microsoft SQL Server (MSSQL) | 2019 |
| SQL Server Management Studio (SSMS) | 20.2 |
Hardware requirements
- RAM: 32GB
- HDD: 120GB
- Processor: 2CPUs
For comprehensive guide, check out help.sap.com.
TOC
This tutorial is divided into following sections
- Windows Server 2022 setup
- Microsoft SQL Server (MSSQL) 2019 setup
- SAP NetWeaver 7.5 setup
- Enable Clickjacking
- SAP cryptographic library
- SAP IDM 8.0 - Standard System installation
- Install SAP management console
- Post installation
- Starting the IDM
1. Windows Server 2022 setup
Ensure that Windows Server 2022 (any desktop edition) is installed.
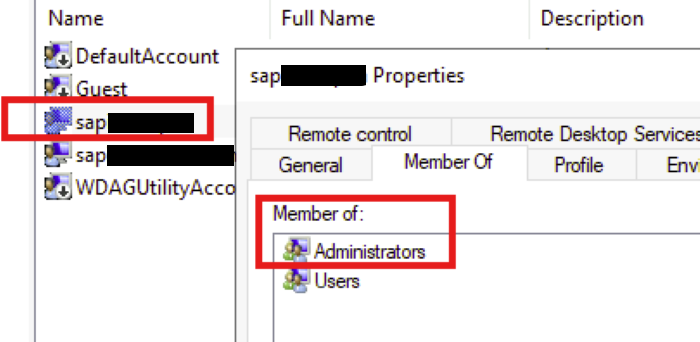
1.1. Create an administrative account
Avoid using the default Windows Server administrator account to install SAP IDM.
Instead, create a new administrative user and add it to the saplocalhost\administrator group.
1.2. Deactivate the File and Directory Attribute Caches
Open powershell as administrator and run the following commands:
Set-SmbClientConfiguration -FileInfoCacheLifetime 0
Set-SmbClientConfiguration -FileNotFoundCacheLifetime 0
Set-SmbClientConfiguration -DirectoryCacheLifetime 0
1.3. Verify NTFS
Make sure all drives are NTFS.
1.4. Virtual memory
- Make sure that you provide sufficient virtual memory
- I used about 50GB (will be discussed later)
2. Microsoft SQL Server (MSSQL) 2019 setup
2.1. MSSQL 2019
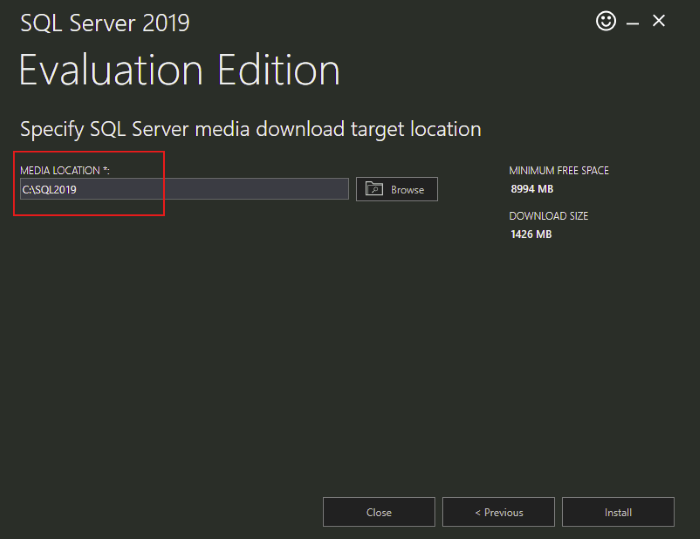
Download MSSQL 2019 for this lab. I will be using the MSSQL 2019 Evaluation version, which you can obtain from Microsoft's evaluation center.

Provide target media location to be downloaded:
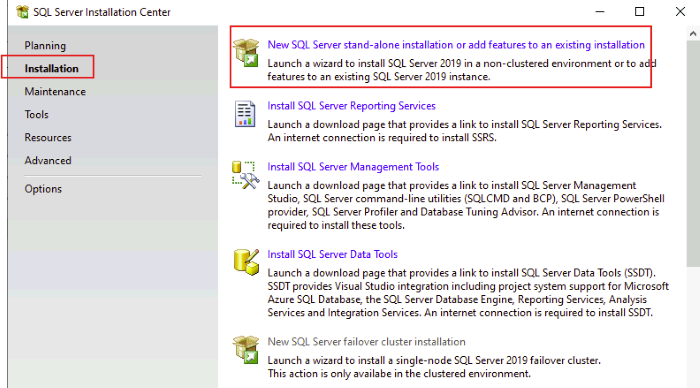
Click on Standalone installation:
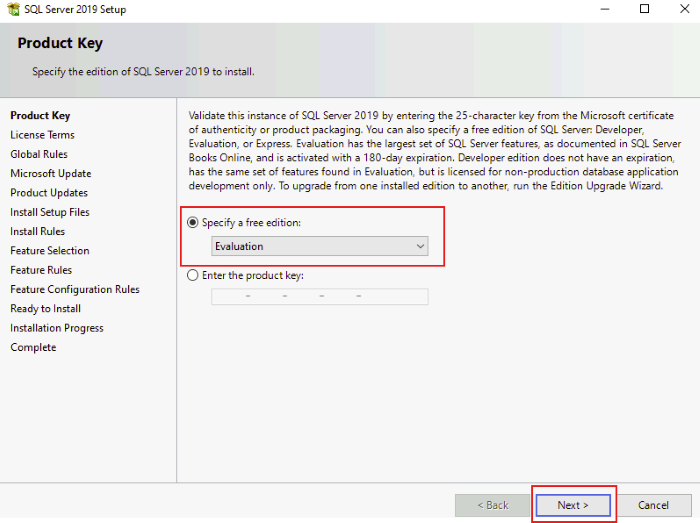
In my case, I am using the Evaluation version, but if you have a license key, please use that instead.
Accept license agreement:
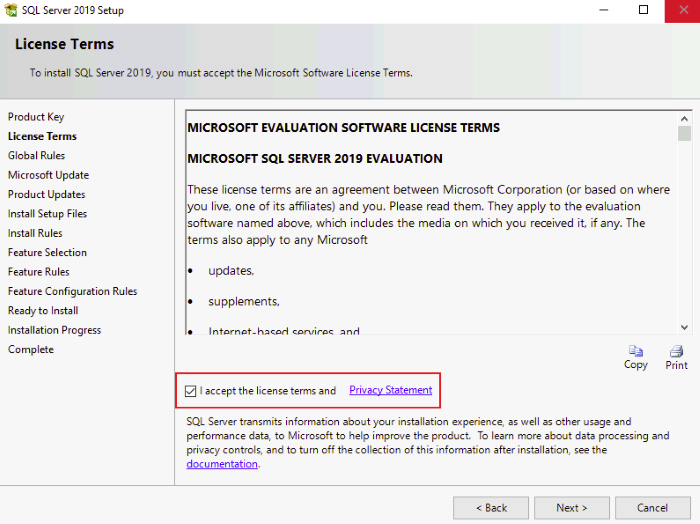
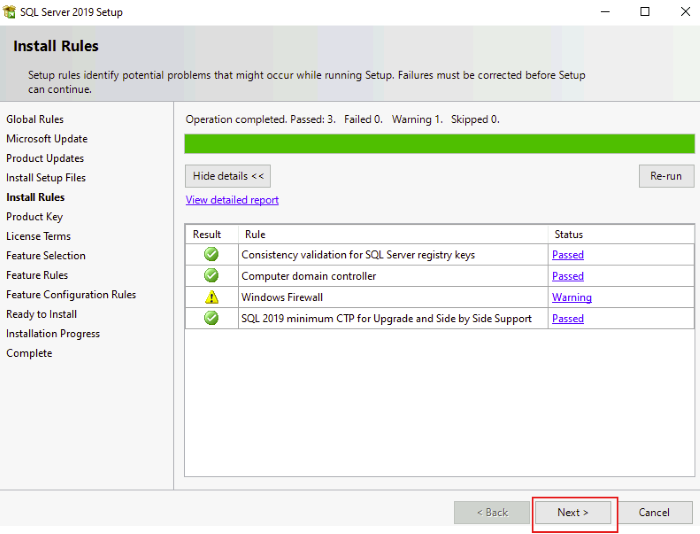
Click Next
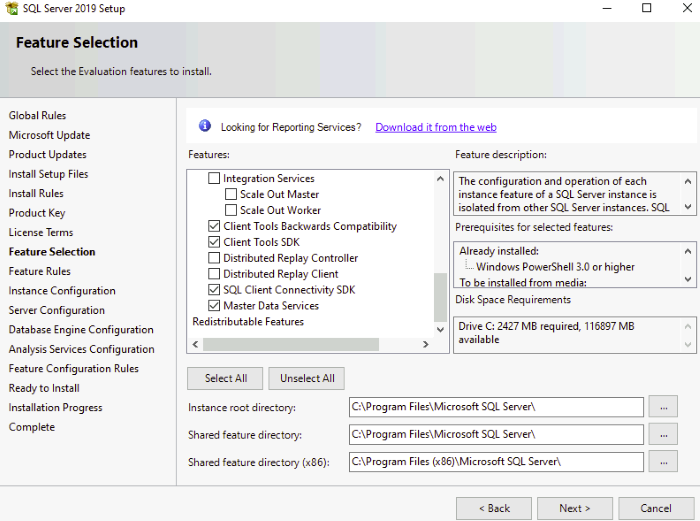
For feature selection, select Database Engine Service and features (as your requirement)
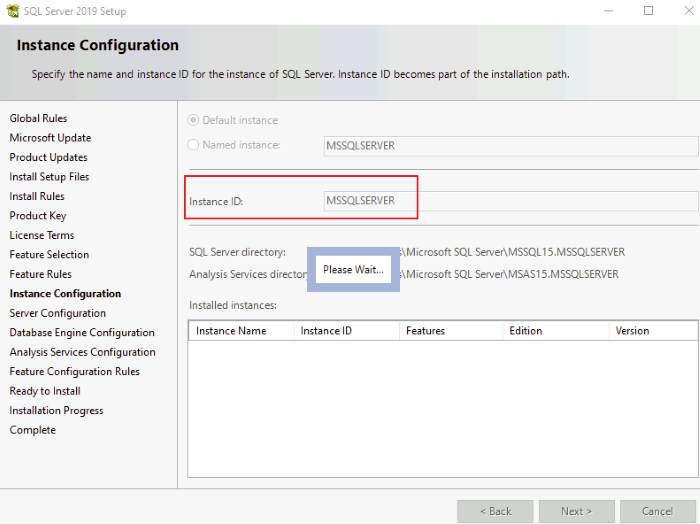
Provide instance ID as MSSQLSERVER:
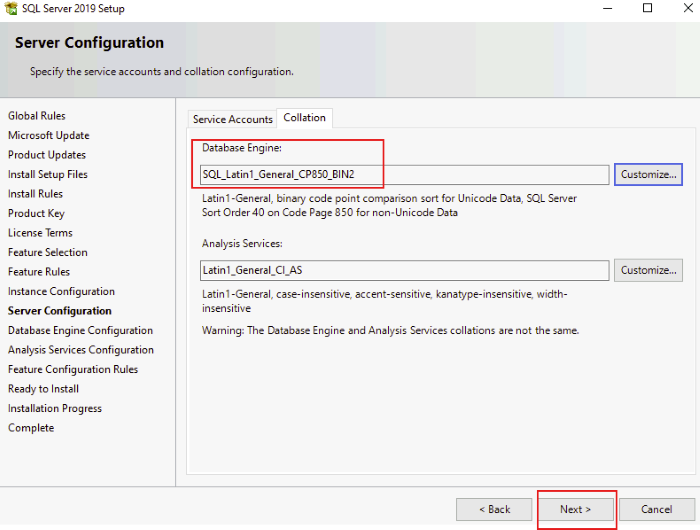
Database Engine collation must be SQL_Latin1_General_CP850_BIN2:
Here, select Mixed Mode and provide password. And click Add Current User:

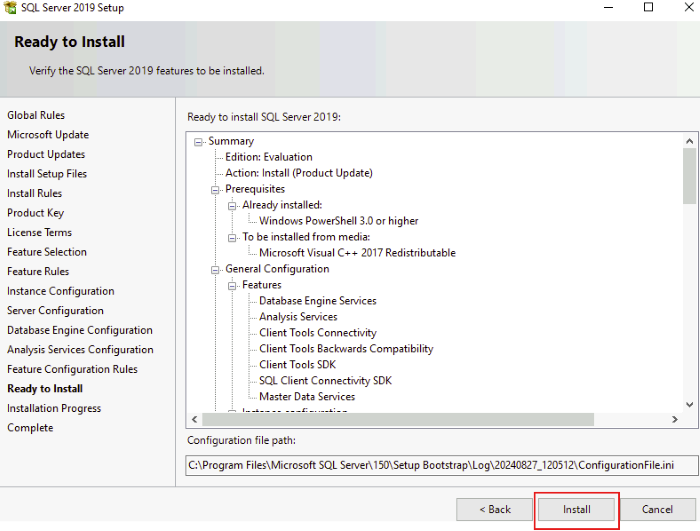
Click Install:
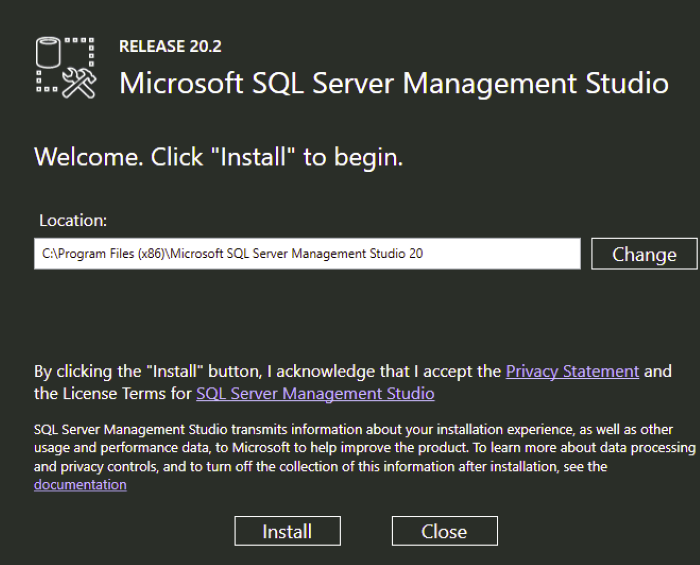
2.2. Microsoft SQL Server Management Studio (SSMS)
Next, install SSMS. You can download it from microsoft.com.
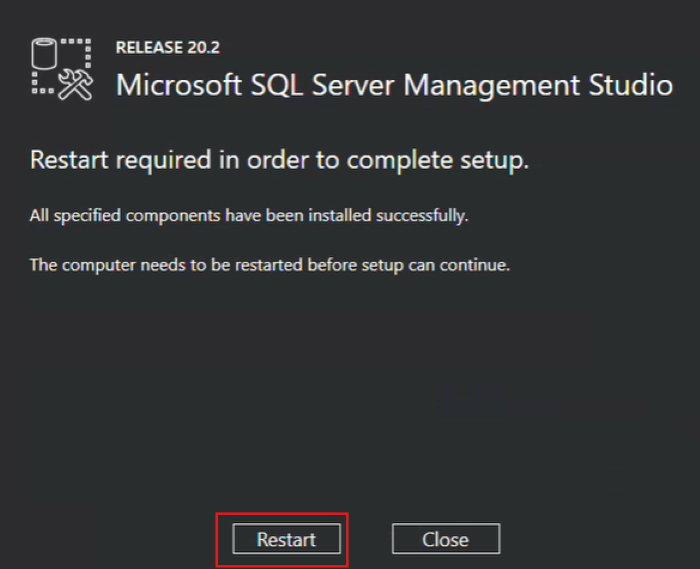
After the installation, be sure to restart your operating system
Now, open SQL Server Management Studio and enter the sa credentials
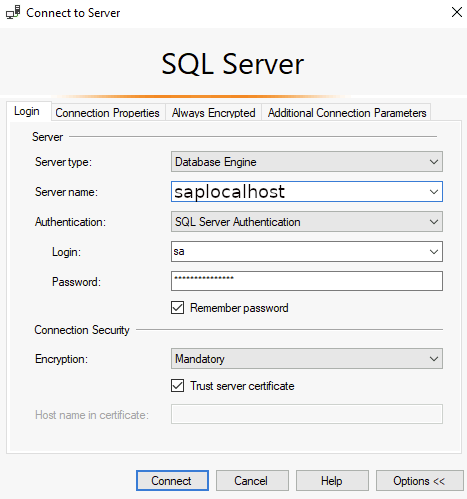
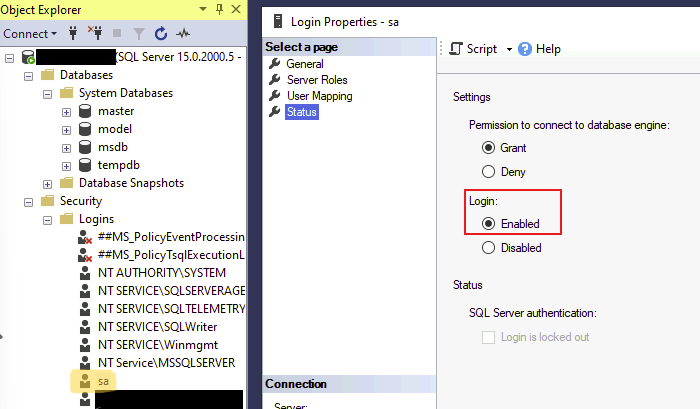
Ensure that the sa login is enabled, as shown in the figure below
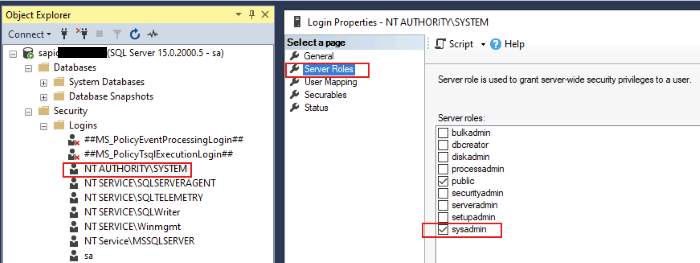
2.3. NT AUTHORITY\SYSTEM
NT Authority/SYSTEM is a built-in Windows account with the highest level of privileges on a local system.
Add sysadmin server role to the NT AUTHORITY\SYSTEM
2.4. Extract JDBC connect
Download the Microsoft JDBC Driver 7.0 for SQL Server from microsoft.com and extract the contents to the C:\SQL2019 folder.
3. SAP NetWeaver 7.5 setup
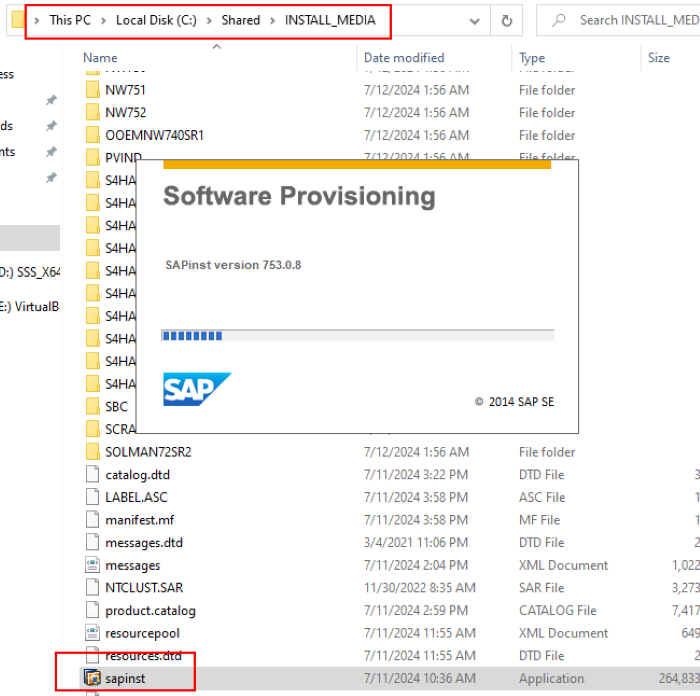
Create a folder named INSTALL_MEDIA and use it for all installation purposes here after.
3.1. SAP Software Provisioning Manager
Download sapcar.exe and SWPM10SP41_5-20009707.SAR from the SAP download center.
Open PowerShell (PS) as an administrator.
Then extract SWPM10SP41_5-20009707.SAR as mentioned below:
PS C:\INSTALL_MEDIA> .\sapcar.EXE -xvf .\SWPM10SP41_5-20009707.SAR -R .\SWPM\
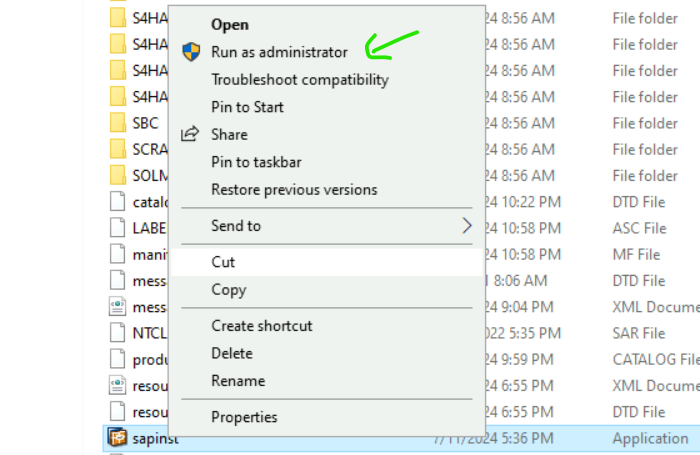
Now, run sapinst.exe as administrator
Popup shall appear; as a result, you will be redirect to the https://saplocalhost:4237/sapinst/docs/index.html
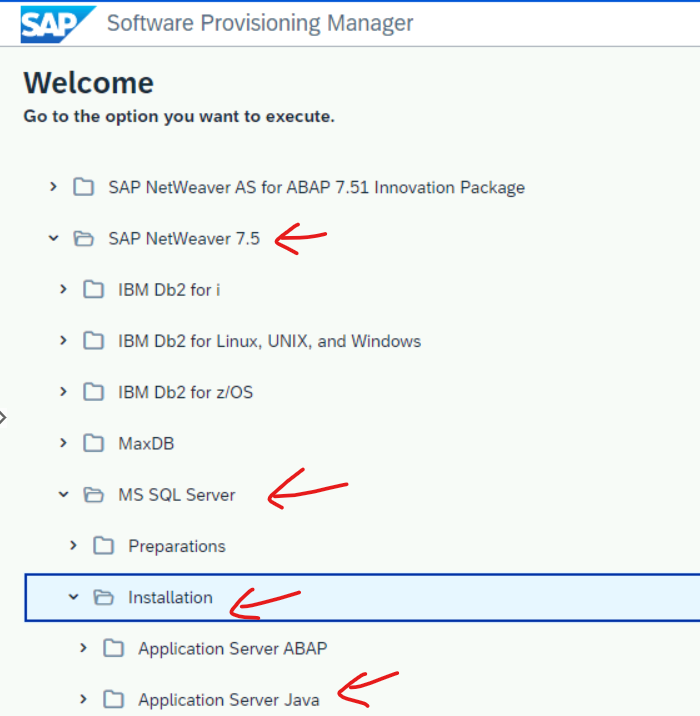
Expand SAP NetWeaver 7.5 > MS SQL Server > Installation > Application Server Java > Select Standard System

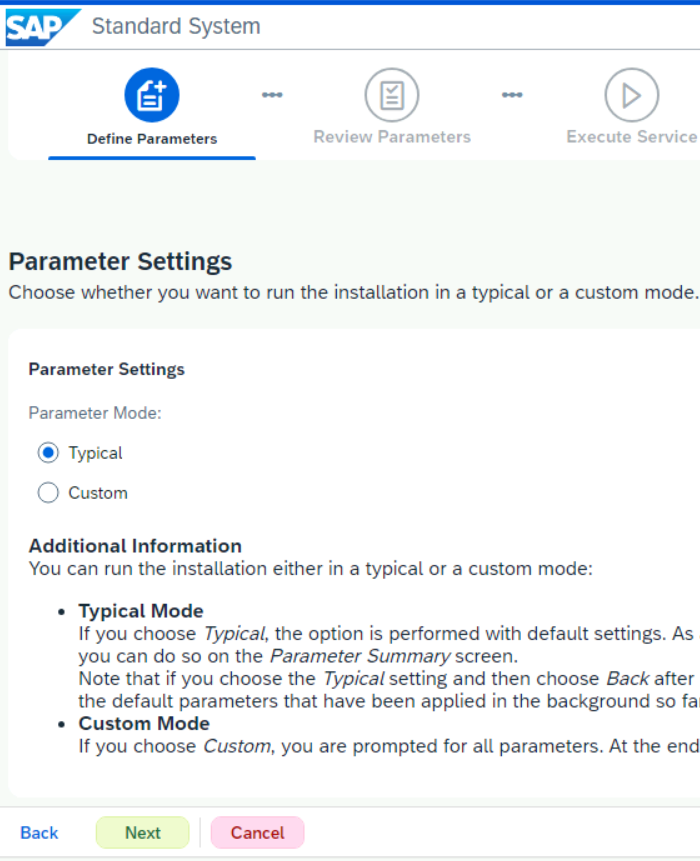
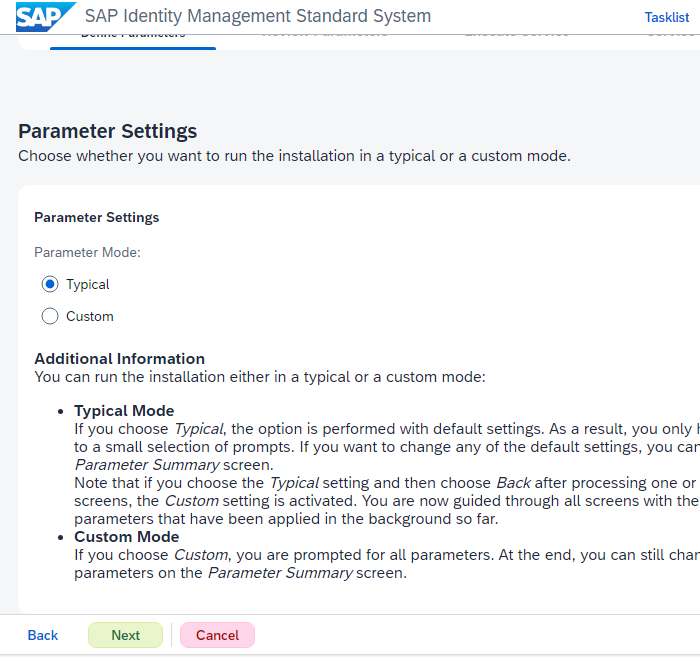
Select Typical parameter mode
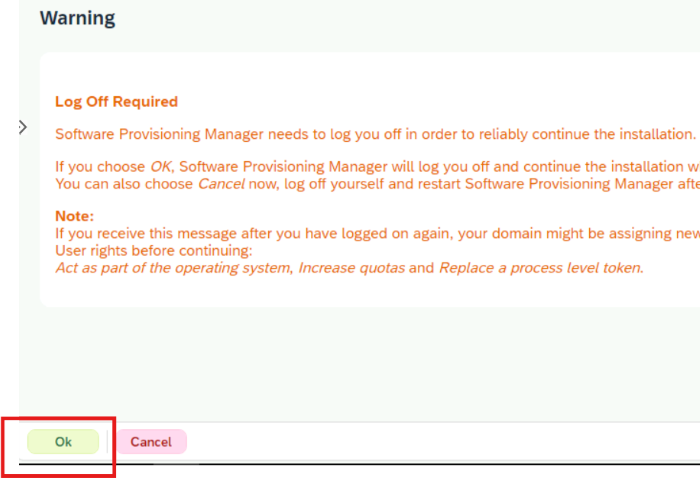
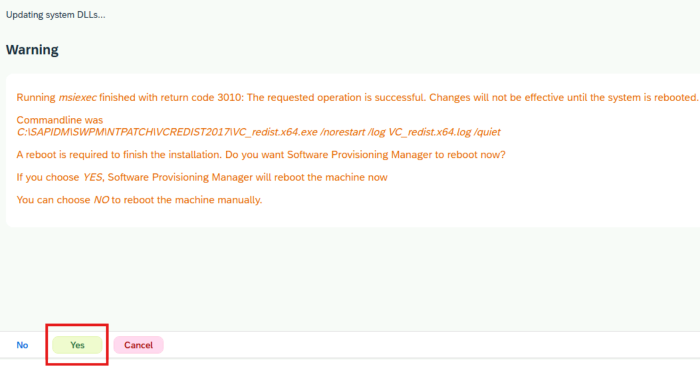
Click Ok for log off requirement
Click Yes for reboot
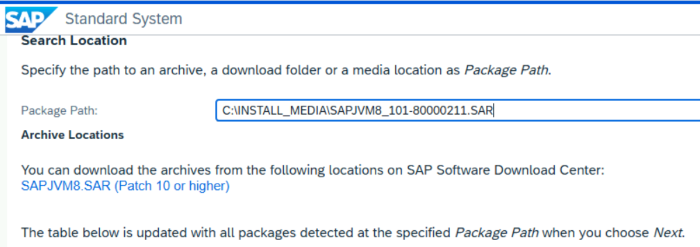
Download SAPJVM8_101-80000211.SAR from the software center and put it into INSTALL_MEDIA folder.
Then provide the package path the input field and click Next
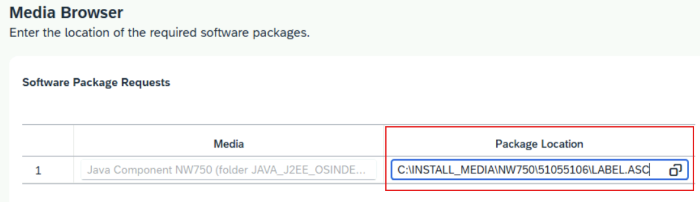
Download Java Component NW750 (folder JAVA_J2EE_OSINDEP_UT) i.e., 51055106.zip and extract it
Copy the extracted location of LABEL.ASC and provide it to the input field as mentioned below:
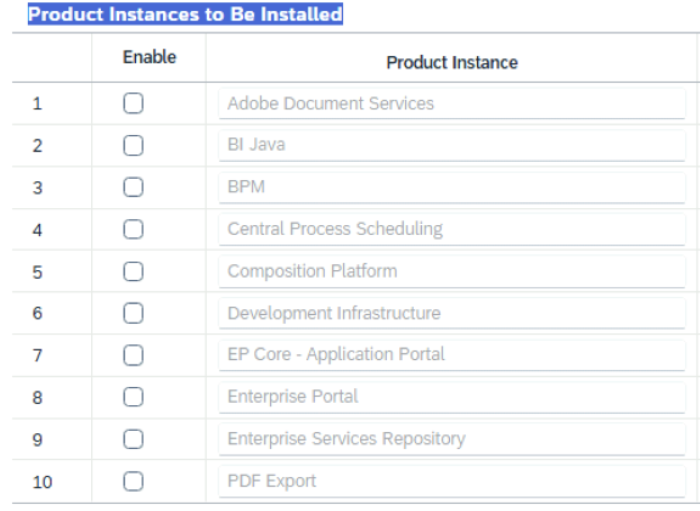
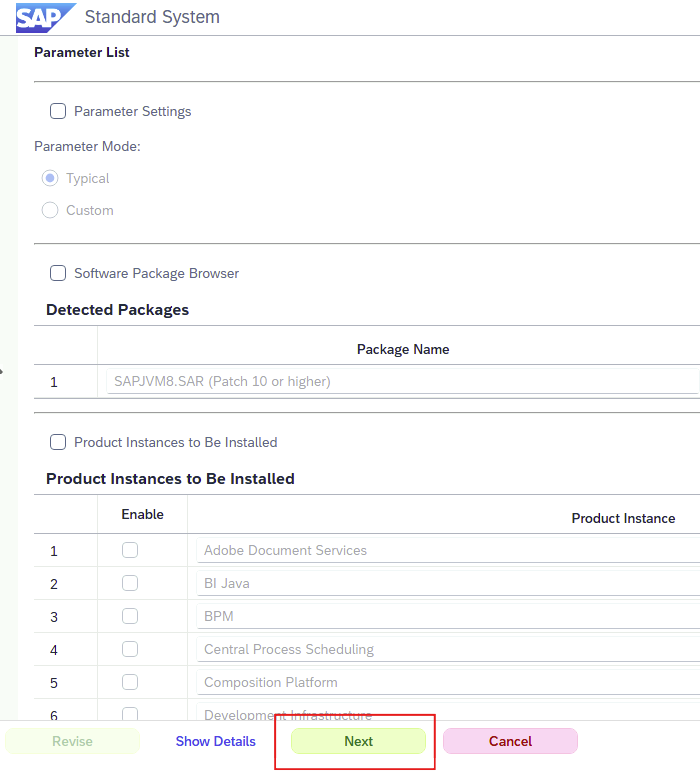
You'll be seeing couple of Product Instances to Be Installed options, for this tutorial I am selecting nothing.
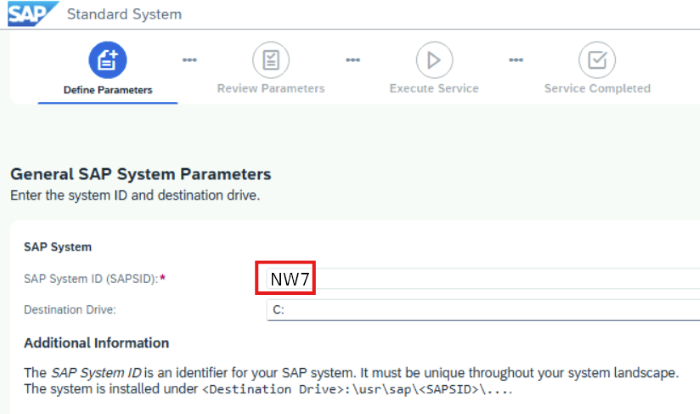
Provide three leter SAPSID value. For this demo I will be using NW7
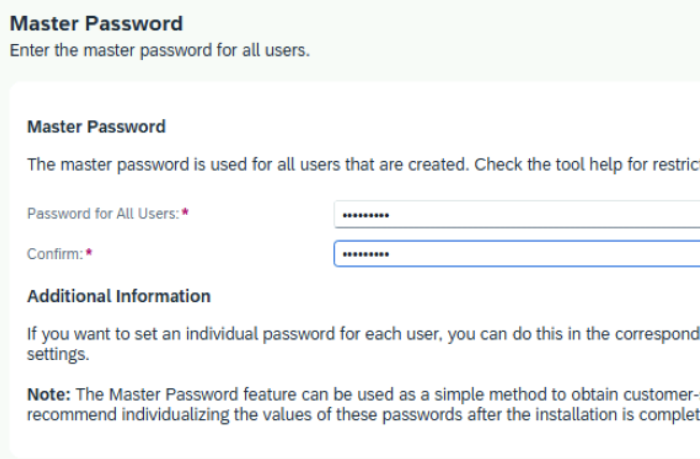
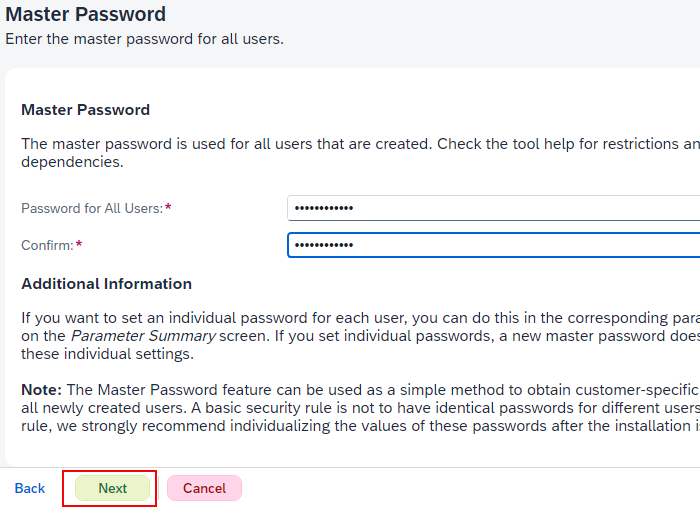
Provide master password for all users
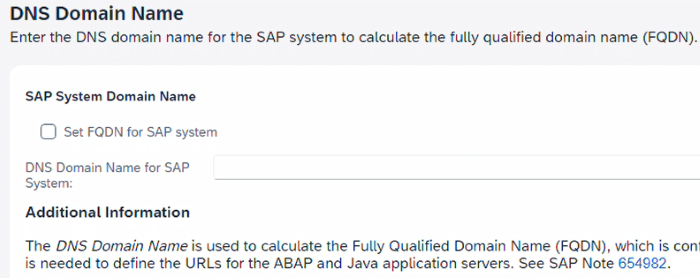
For this demo, I am using localhost hence uncheck Set FQDN for SAP system:
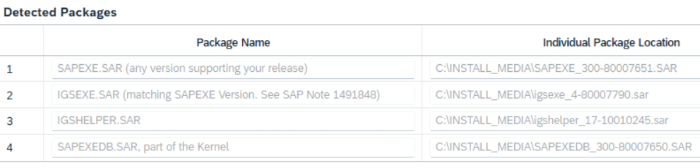
Download:
- igsexe_4-80007790.sar
- igshelper_17-10010245.sar
- SAPEXE_300-80007651.SAR
- SAPEXEDB_300-80007650.SAR
And provide the downloaded path
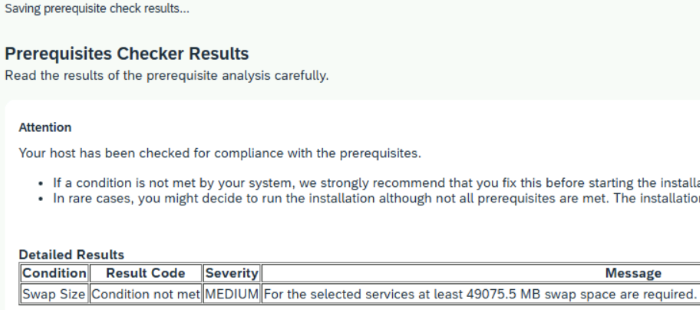
The following image basically means that we'll be needing 49075.5 MB swap space
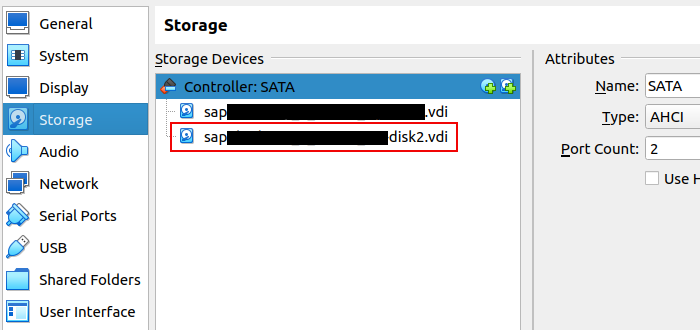
If you are using Oracle VirtualBox, you can attach ~50GB vdi to the VM
If you are using Azure, you can achieve this by:
- Go to
Disks - Click
Create and attach a new disk - and provide relevant information

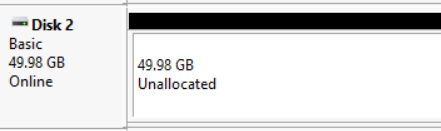
If you open Disk Management, you will be seeing new created extra 50GB drive
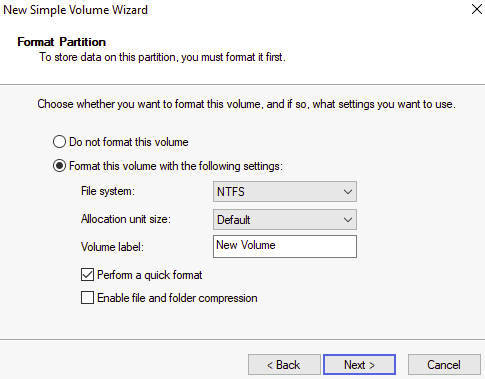
Now, select New Simple Volume wizard by clicking right button
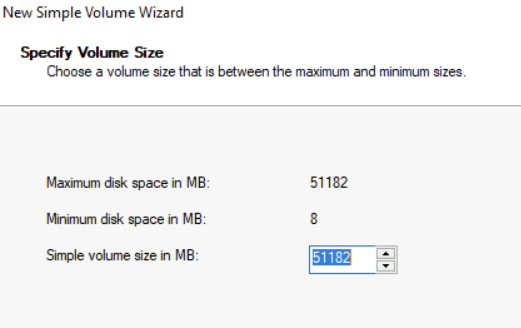
File system should be NTFS
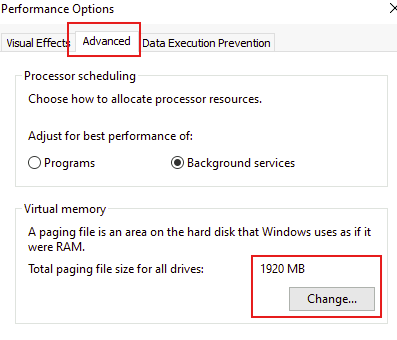
Goto Advance system properties > and click Settings
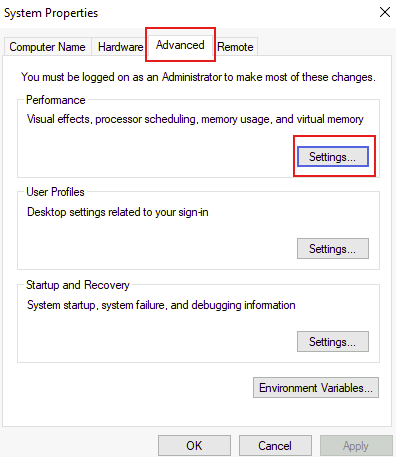
Change Virtual Memory as shown below
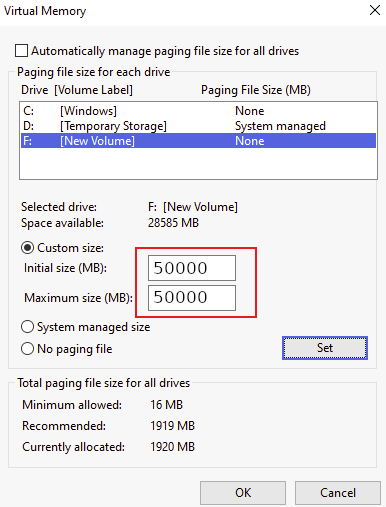
You may need to restart your server
If you restart your server. Run sapinst.exe and select Continue with existing run option
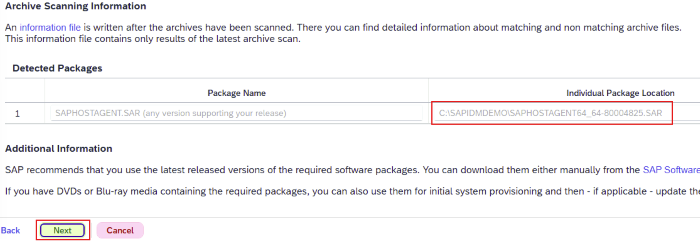
Now, next step is to download SAPHOSTAGENT64_64-80004825.SAR and locate to the package path
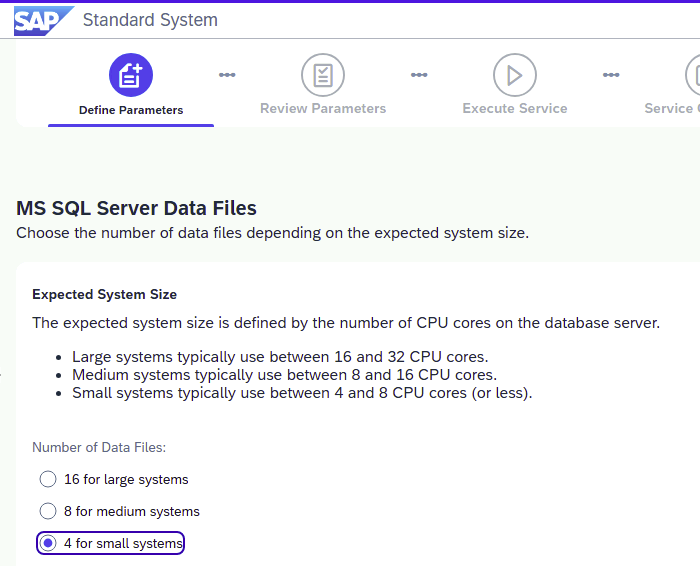
For demo purpose, 4 for small systems will be enough:
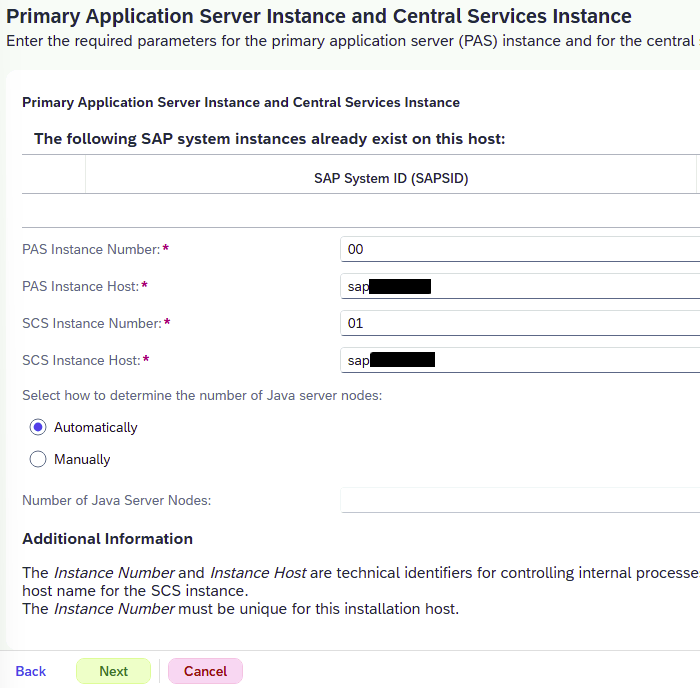
Select Automatically and click Next
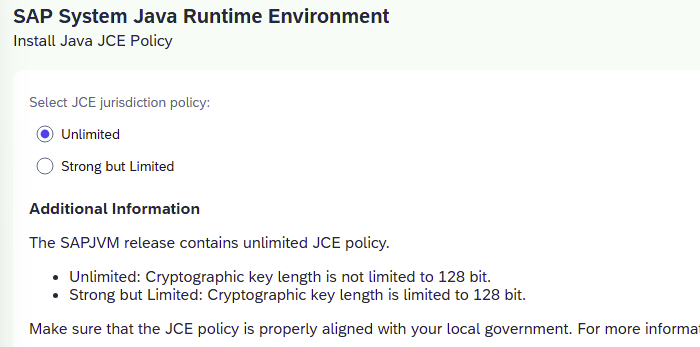
Select Unlimited and click Next
Select No SLD destination and proceed

Now, Review Parameters tab will open. Click Next
It will take sometime to complete the installation
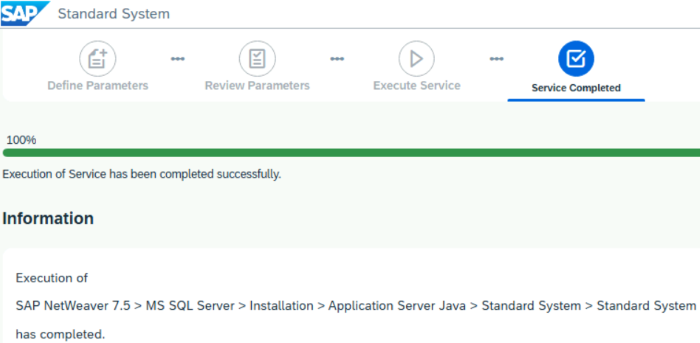
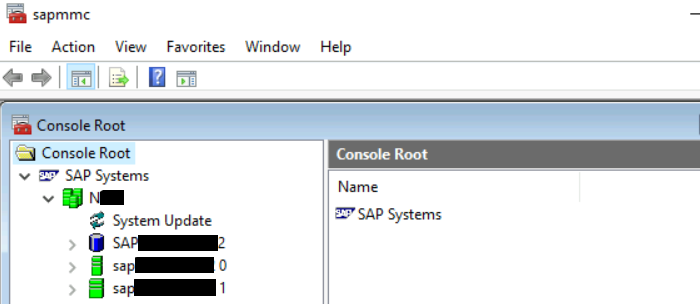
After successful installation, you'll see SAP management console (sapmmc) shortcut on the Desktop
Open it and you'll see NW7 instances are green (that means up and running)
3.2. Edit DEFAULT.PFL
You might encounter the following error
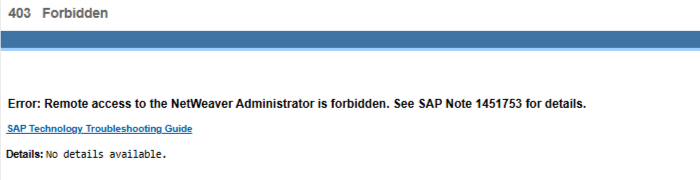
Goto C:\usr\sap\NW7\SYS\profile
Edit DEFAULT.PFL and remove the following line
icm/HTTP/mod_0 = PREFIX=/,FILE=$(DIR_GLOBAL)/security/data/icm_filter_rules.txt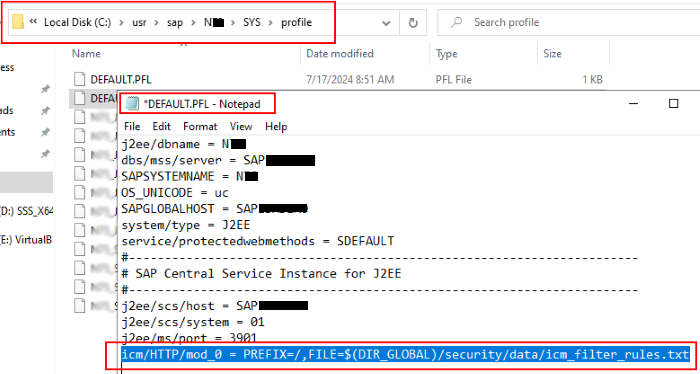
3.3. Restart Windows Server
It's time to restart the windows server and login the server with nw7adm credentials.
Note: nw7adm is derived from SAPSID + adm
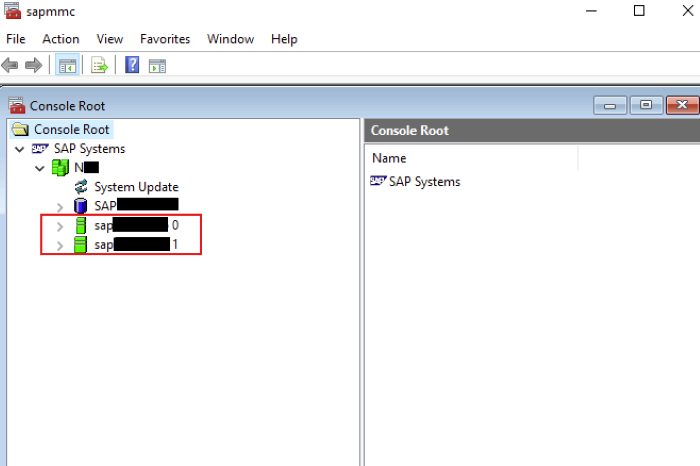
3.4. Post NetWeaver 7.5 tasks
Make sure that the following 4 services are up and running

Now, open sapmmc and make sure that both sap 0 and sap 1 are green
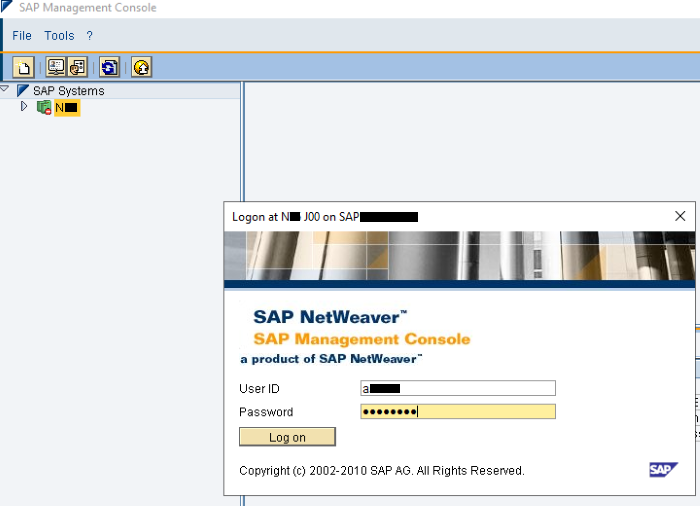
Now, browse saplocalhost:50000.
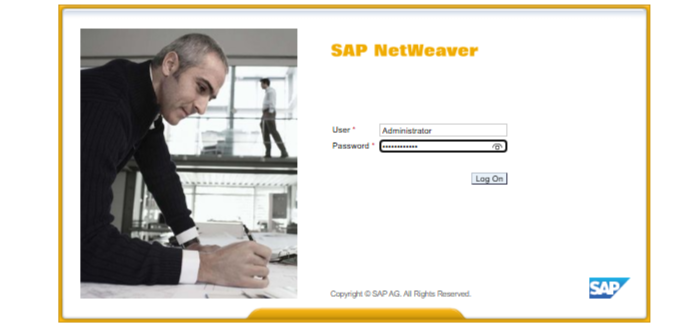
And login NetWeaver with Administrator credentials
4. Enable Clickjacking
Login NetWeaver as administrator
Goto:
- Configuration
- Infrastructure
- Java System properties
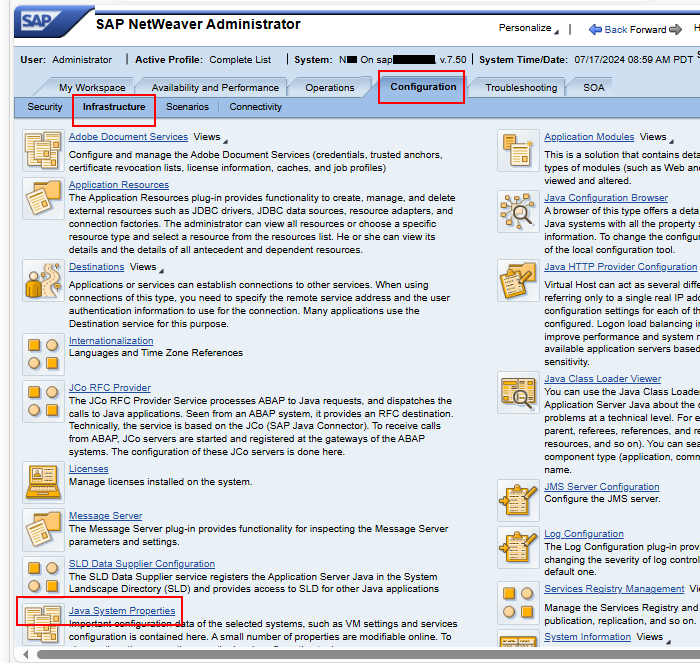
Search for clickjacking and click modify
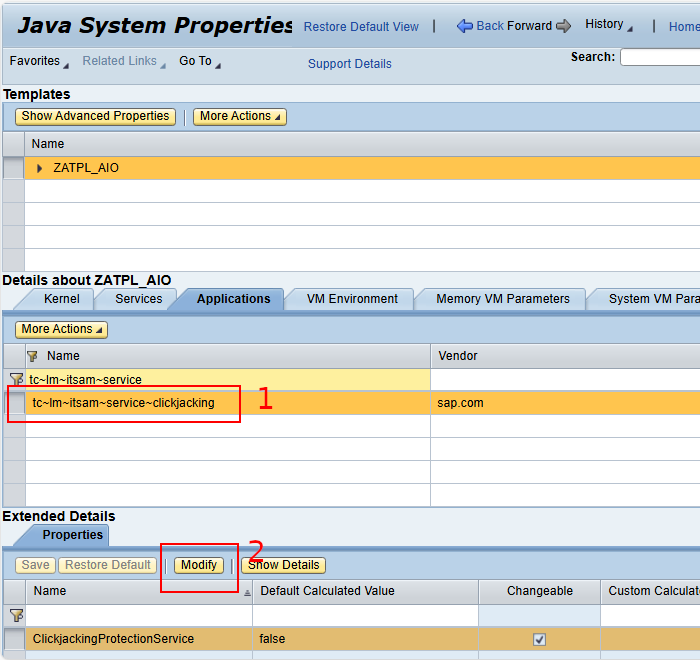
Set custom value to true
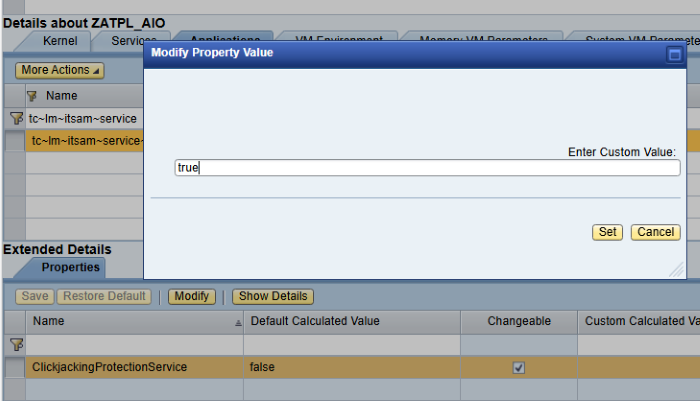
And finally press start for clickjacking
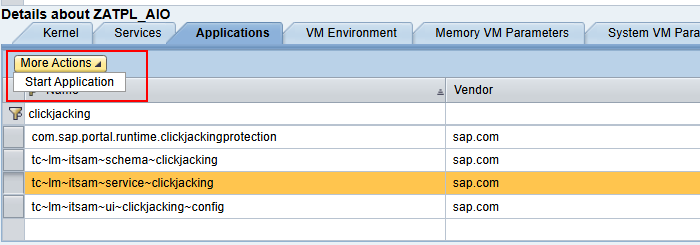
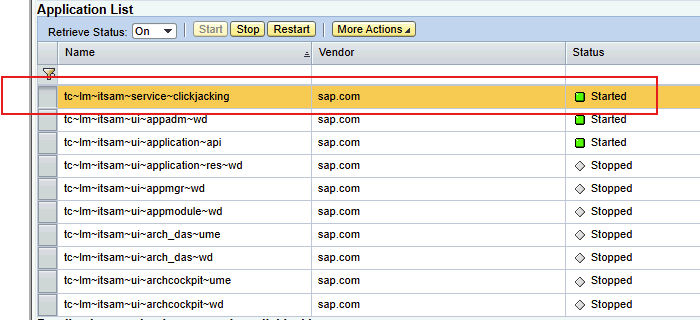
The service should be up and running (green)
5. SAP cryptographic library
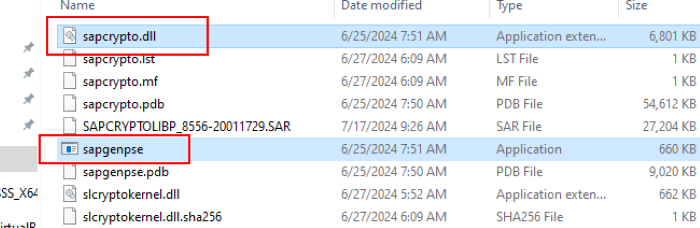
Check if the following file exists inside C:\usr\sap\NW7\SYS\exe\uc\NTAMD64 folder:
- sapcrypto.dll
- sapgenpse.exe
6. SAP IDM 8.0 - Standard System - Installation
Login with nw7adm credentials
Make sure that the NW7 is green
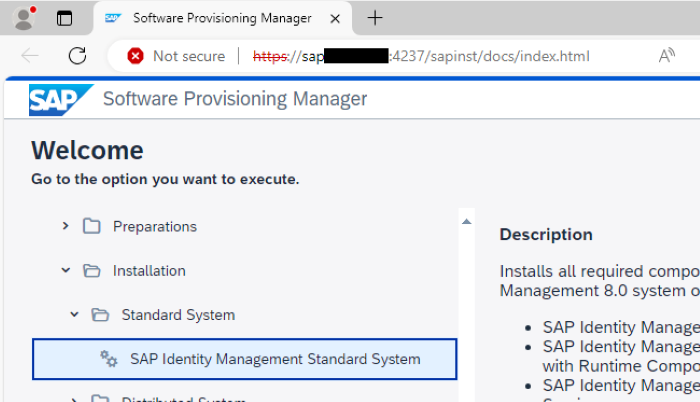
Goto INSTALL_MEDIA and run sapinst.exe as administrator
Navigate to SAP Identity Management Standard System
Select Typical
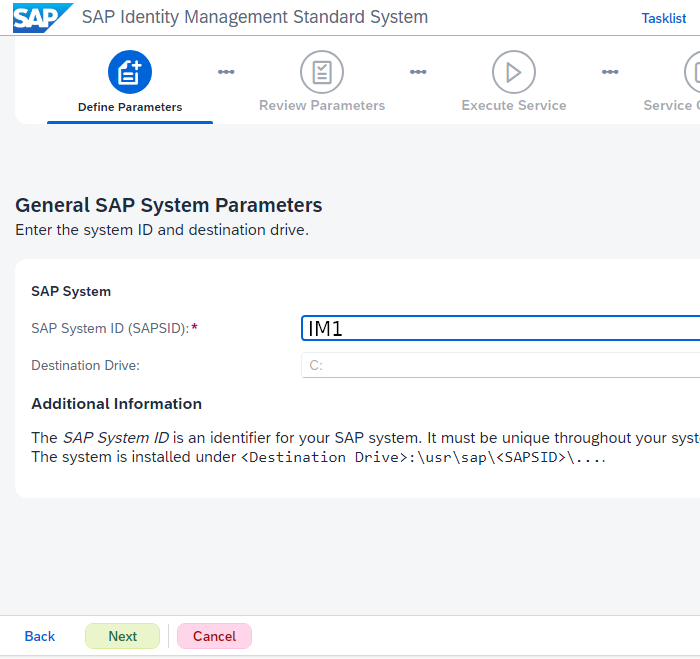
Provide SAPSID
Provide master password
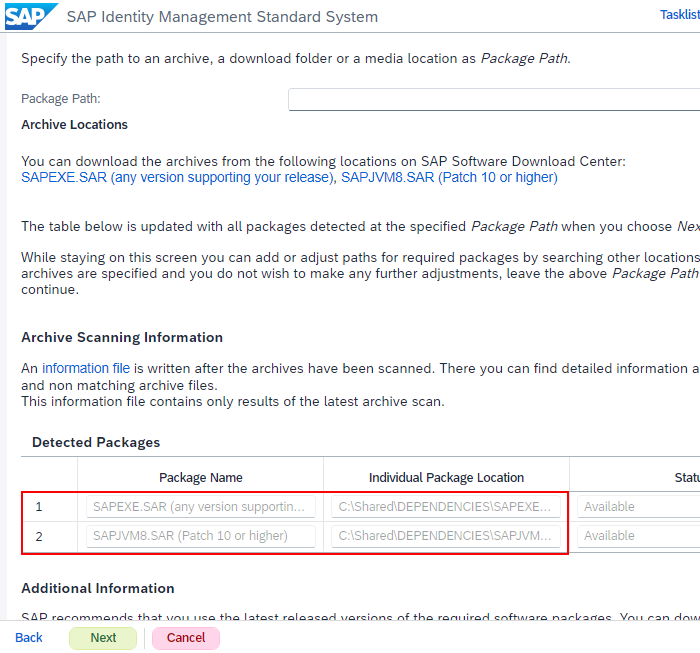
Provide package path for:
- SAPEXE_300-80007651.SAR
- SAPJVM8_101-80000211.SAR
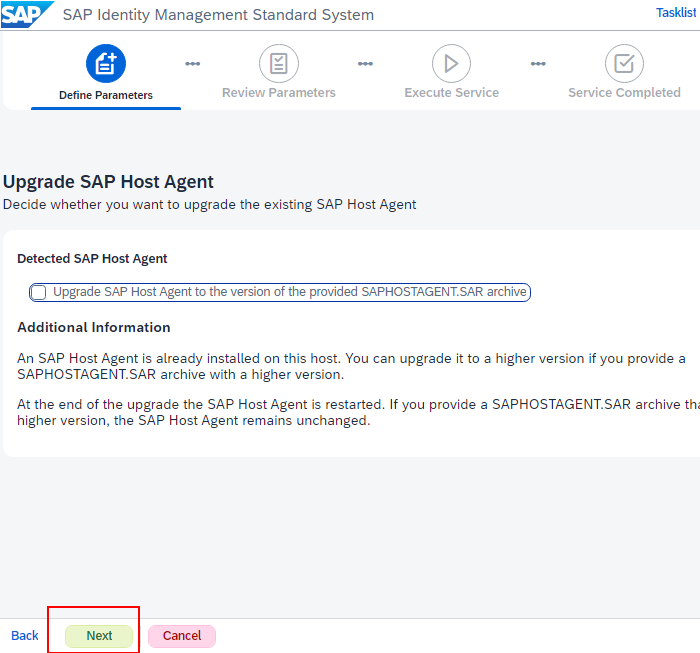
No need to update the host
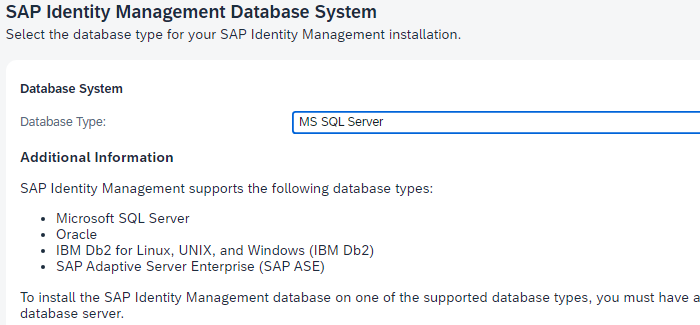
Select MS SQL Server as a database type
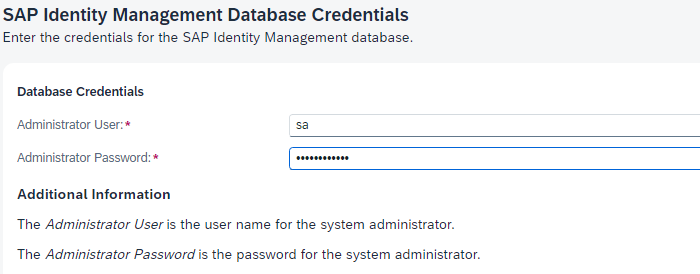
Confirm database parameters

Provide sa database credential
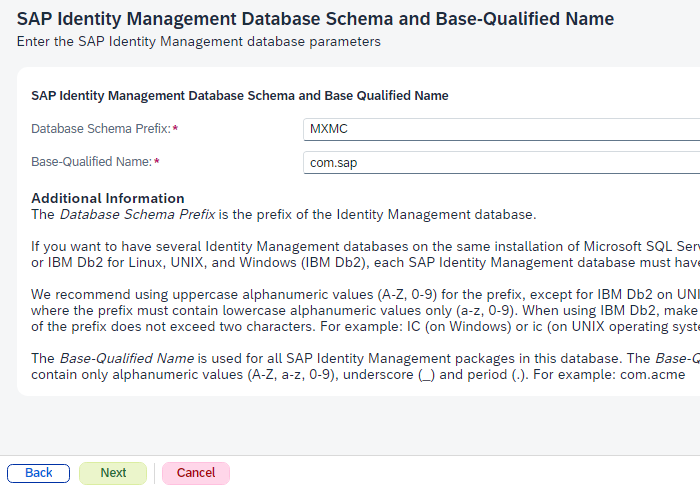
Provide database schema name and base qualified name as mentioned below
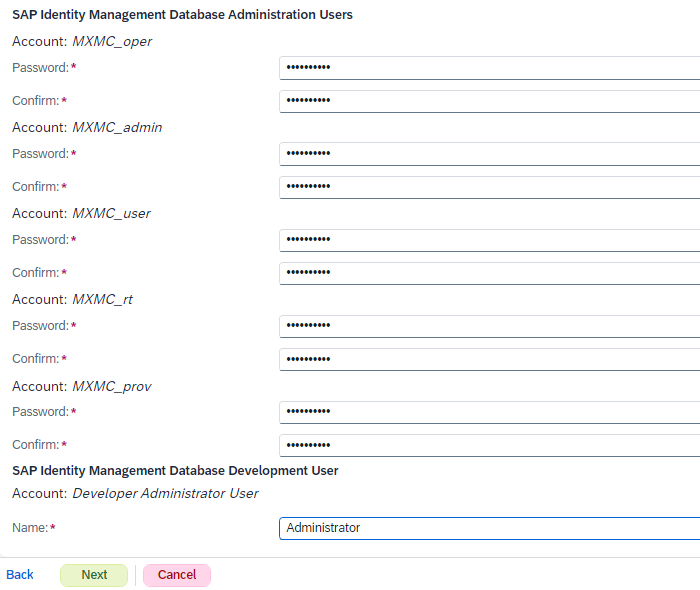
Provide developer administrator user name. For e.g., Administrator
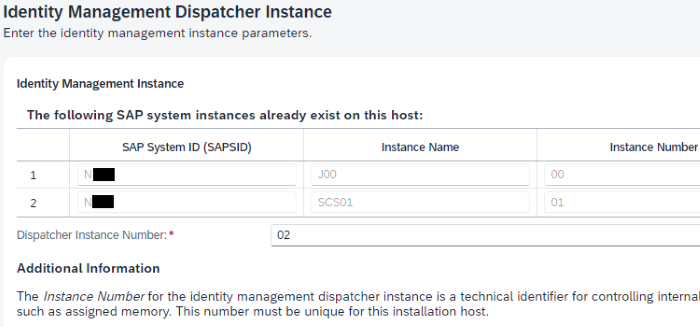
Confirm SAP system instances
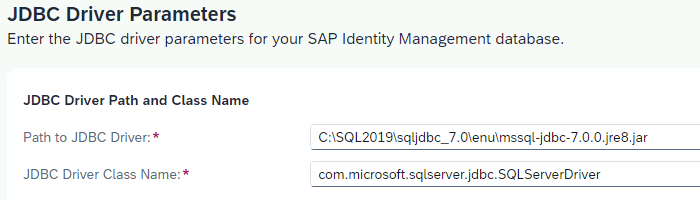
Provide JDBC path and class name as mentioned below:
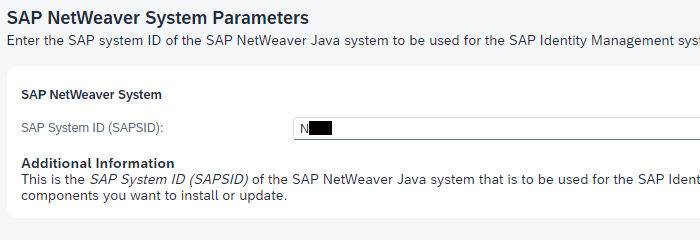
Provide SAPSID
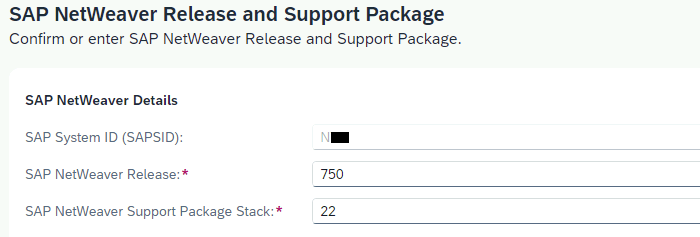
Confirm NetWeaver details
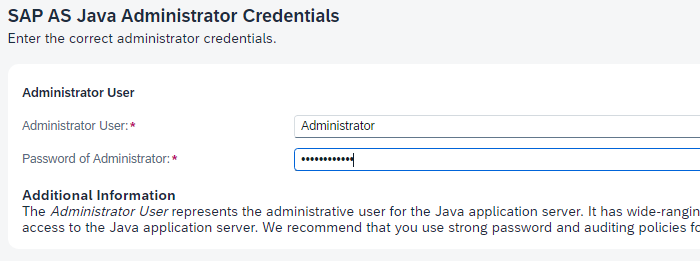
Provide JAVA administrator credentials
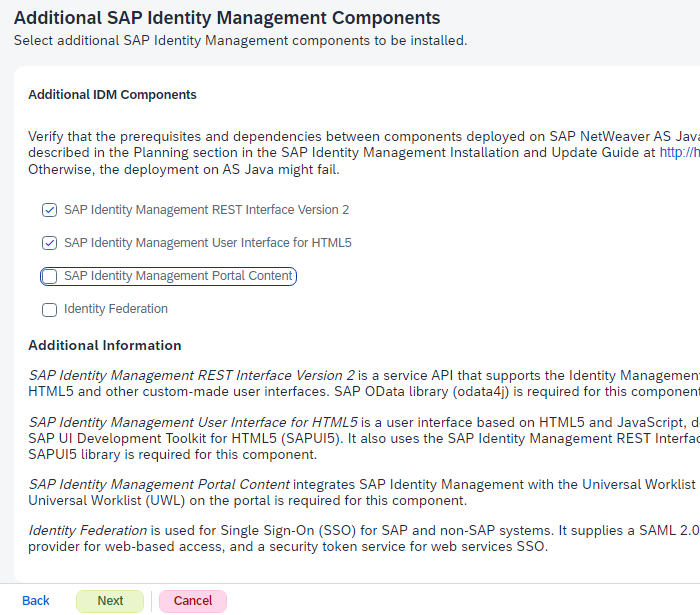
For this demo I will be selecting SAP Identity Management REST v2 and User interface for HTML5
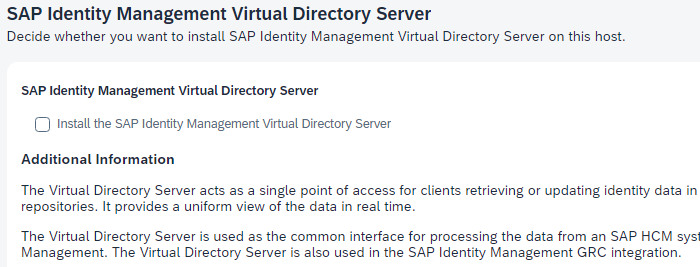
I will skip Virtual Directory Server
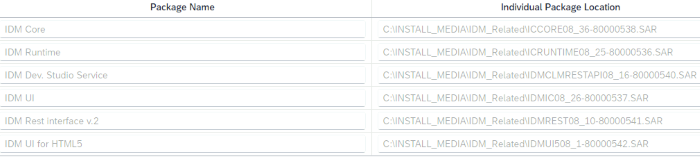
Download the following:
- ICCORE08_36-80000538.SAR
- ICRUNTIME08_25-80000536.SAR
- IDMCLMRESTAPI08_16-80000540.SAR
- IDMIC08_26-80000537.SAR
- IDMREST08_10-80000541.SAR
- IDMUI508_1-80000542.SAR
Choose the following encryptions options
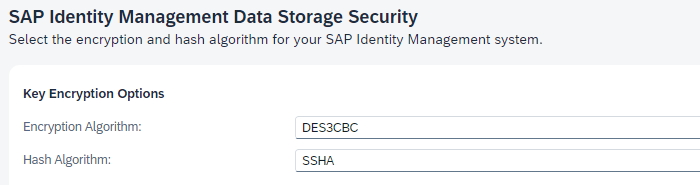
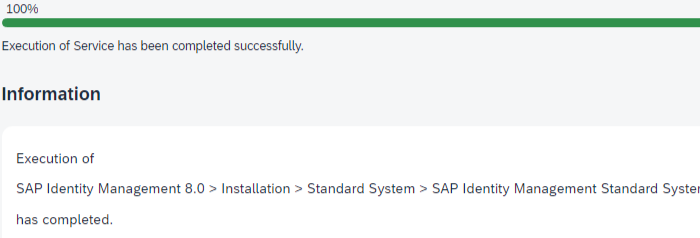
You can proceed next in this parameter summary page

Finally, restart the Windows server after successful installation
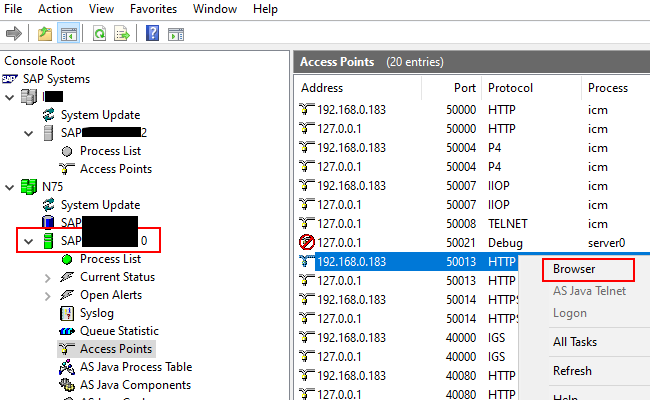
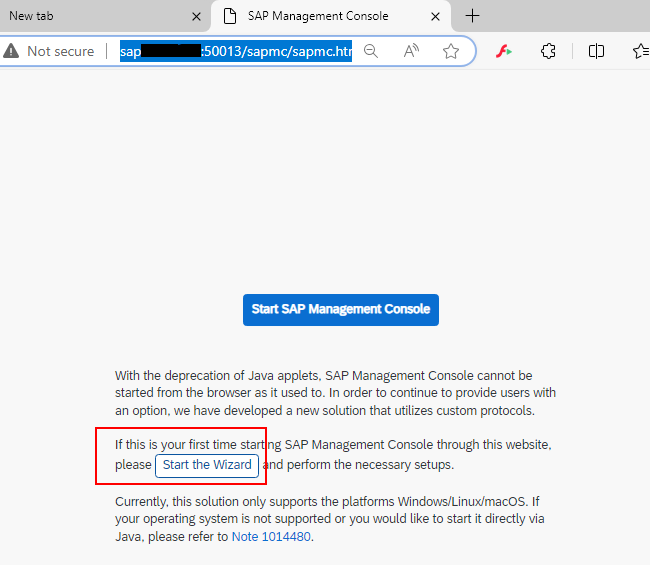
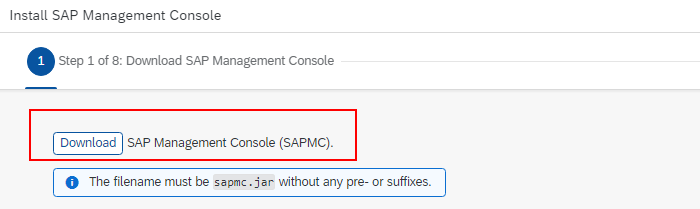
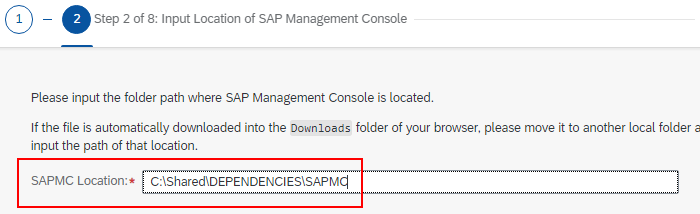
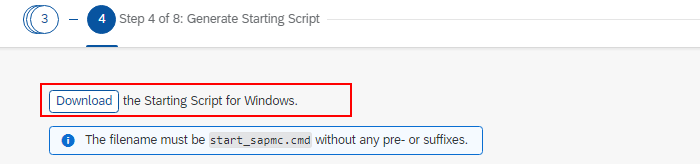
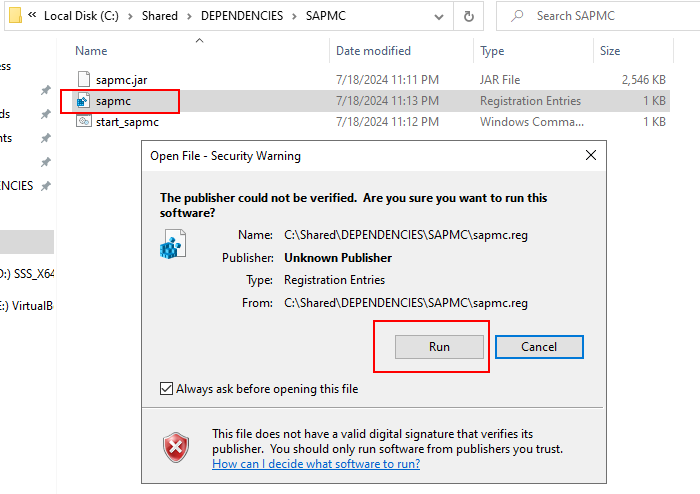
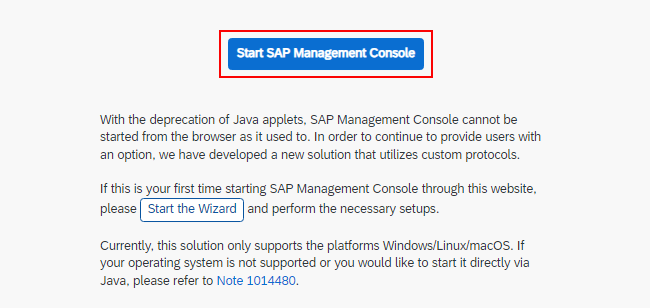
7. Install SAP management console
Make sure NW7 is green (up and running)


8. Post installation
8.1. services.msc
Goto services.msc and make sure the following services are running:
- SAPNW7_00
- SAPNW7_01

8.2. Initial dispatcher
Goto C:\usr\sap\IM1\IDM02\Identity_Center and make sure dispatcher is up and running
8.3. JAVA_HOME
Add a new System variable
- JAVA_HOME: C:\usr\sap\IM1\IDM02\exe\sapjvm_8
Edit Path for system variable:
- %JAVA_HOME%\bin
Add a new User variable
- JAVA_HOME: C:\usr\sap\IM1\IDM02\exe\sapjvm_8
Edit Path for User variable:
- %JAVA_HOME%\bin
8.4. JDBC connection
8.4.1. Deploy a New JDBC Drivers
- Goto: http://saplocalhost:50000/nwa
- Goto Configuration > Infrastructure > Application Resources
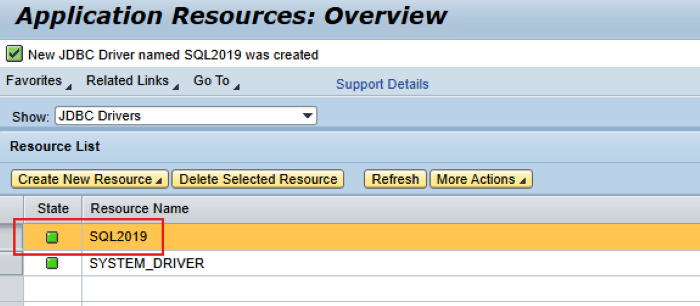
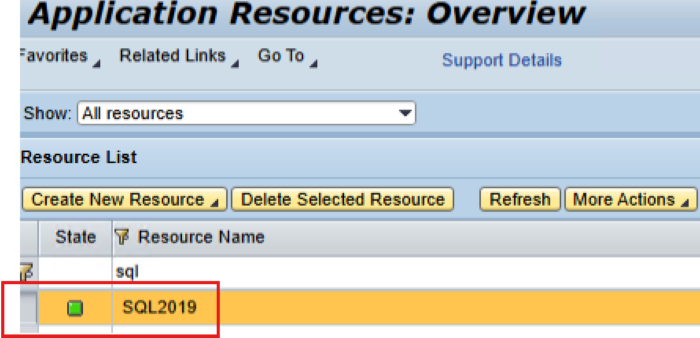
- Choose Create New Resource
Deploy New JDBC Driver. - Enter name for the driver:
SQL2019. - Choose Add New Driver File .
- Browse to the driver files on the system:
C:\SQL2019\sqljdbc_7.0\enu\mssql-jdbc-7.0.0.jre8.jar - Choose Save
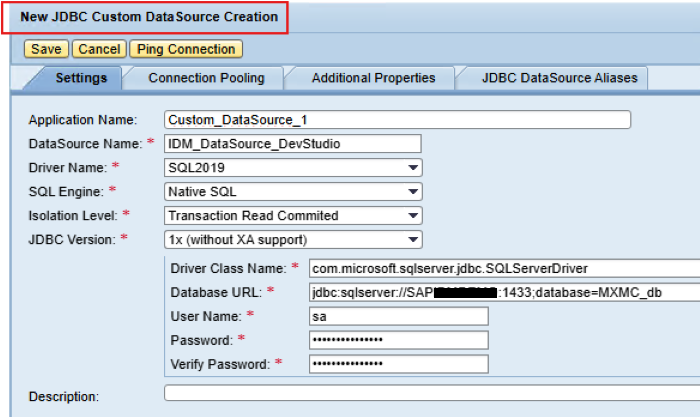
8.4.2. IDM_DataSource_DevStudio
Add the Identity Management database as the data source on your SAP NetWeaver AS for Java as below:
| keys | values |
|---|---|
| Application name | IDM_DataSource_DevStudio |
| DataSource Name | IDM_DataSource_DevStudio |
| Driver Name | SQL2019 |
| SQL Engine | Native SQL |
| Isolation Level | Transaction Read Commited |
| JDBC Version | 1x (without XA support) |
| Driver Class Name | com.microsoft.sqlserver.jdbc.SQLServerDriver |
| Database URL | jdbc:sqlserver://saplocalhost:1433;database=MXMC_db |
| username | MXMC_admin |
| password | **** |
Restart IDM_DataSource_DevStudio
8.4.3. IDM_DataSource
Additionally, create a new custom data source called IDM_DataSource:
| keys | values |
|---|---|
| Application name | IDM_DataSource |
| DataSource Name | IDM_DataSource |
| Driver Name | SQL2019 |
| SQL Engine | Native SQL |
| Isolation Level | Transaction Read Commited |
| JDBC Version | 1x (without XA support) |
| Driver Class Name | com.microsoft.sqlserver.jdbc.SQLServerDriver |
| Database URL | jdbc:sqlserver://saplocalhost:1433;database=MXMC_db |
| username | MXMC_prov |
| password | **** |
Restart IDM_DataSource
8.5. JAVA system properties
Make sure SQL2019 (JDBC driver) is up and running.
Goto Configuration > Infrastructure > Java system properites > Application
8.5.1. idmdevstudio
Edit idmdevstudio as mentioned below:
| key | values |
|---|---|
| com.sap.idm.rcp.crypt.keyfile | C:\usr\sap\IM1\SYS\global\security\data\Key\Keys.ini |
| com.sap.idm.rcp.dsehome | C:\usr\sap\IM1\IDM02\Identity_Center |
| com.sap.idm.rcp.dsehome.java | C:\usr\sap\IM1\SYS\exe\jvm\NTAMD64\sapjvm_8.1.101\sapjvm_8\bin |
| com.sap.idm.rcp.jdbcdriverjar | C:\SQL2019\sqljdbc_7.0\enu\mssql-jdbc-7.0.0.jre8.jar |
| com.sap.idm.rcp.jdbcdrivers | com.microsoft.sqlserver.jdbc.SQLServerDriver |
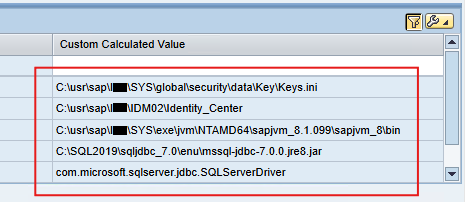
Restart idmdevstudio
8.5.2. tc~idm~jmx~app
Modify tc~idm~jmx~app as mentioned below:
| key | values |
|---|---|
| com.sap.idm.jmx.ac_check_level | 8 |
| com.sap.idm.jmx.crypt.keyfile | C:\usr\sap\IM1\SYS\global\security\data\Key\Keys.ini |
| com.sap.idm.jmx.idstoreid | 1 |
and restart tc~idm~jmx~app
8.5.3. tc~idm~jmx~app
- Make sure this service is up and running.
8.6. SSL
- Goto Configuration > Security > SSL
- Export Entry > PKCS#8 Key Pair
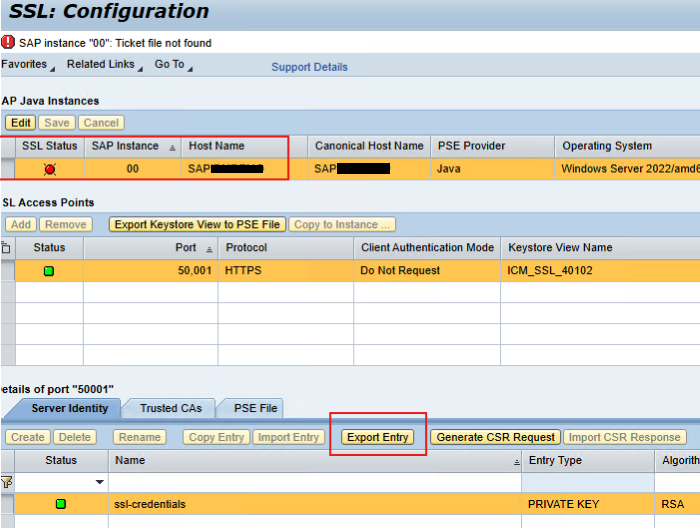
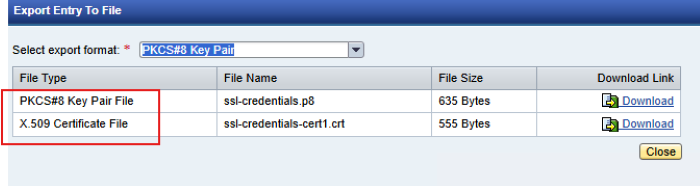
- Copy those downloaded keys and run the following command:
keytool -import -alias my_ssql_cert -file .\certs\ssl-credentials-cert1.crt -keystore cacertsFor:
- C:\usr\sap\NW7\SYS\exe\uc\NTAMD64\jkit\jre\lib\security
- C:\usr\sap\IM1\IDM02\exe\sapjvm_8\jre\lib\security
- C:\usr\sap\IM1\SYS\exe\jvm\NTAMD64\sapjvm_8.1.099\sapjvm_8\jre\lib\security
8.7. Restart sapmc
Restart SAP Management System from sapmc.
8.8. SAP IDM Studio
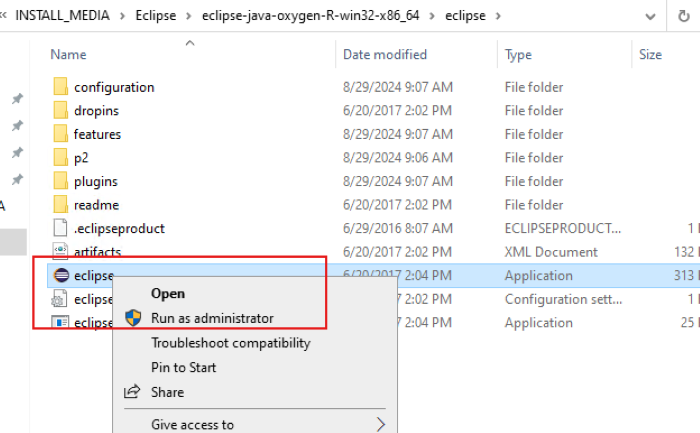
Download Eclipse IDE for Java Developers for eclipse.org
Extract the zip.
And run as Administrator:
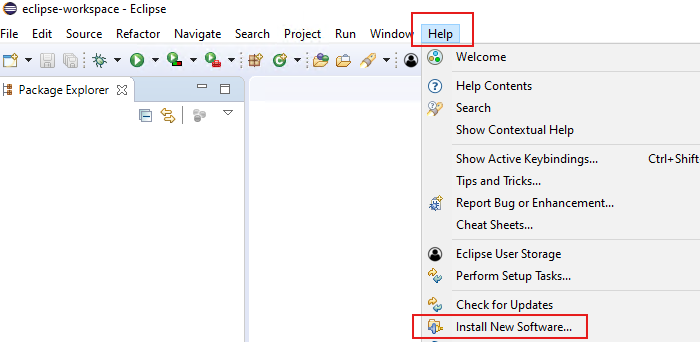
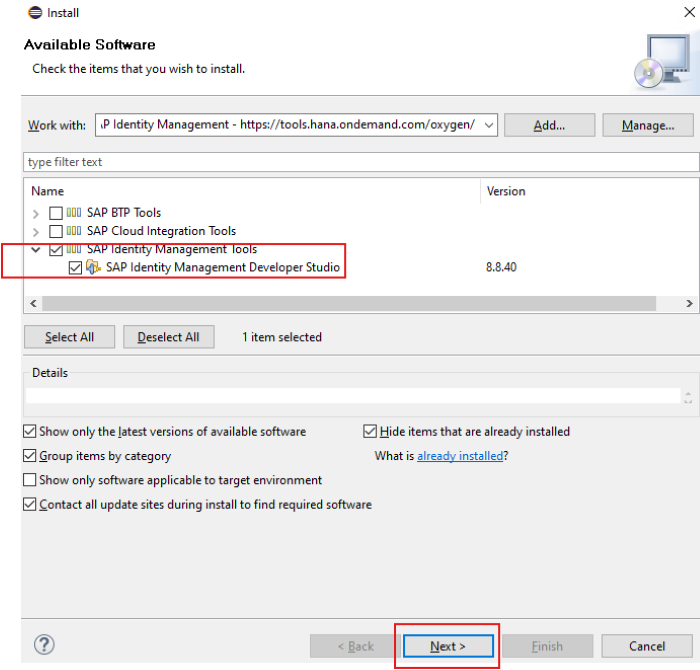
Now, Goto Help menu > Install New Software:
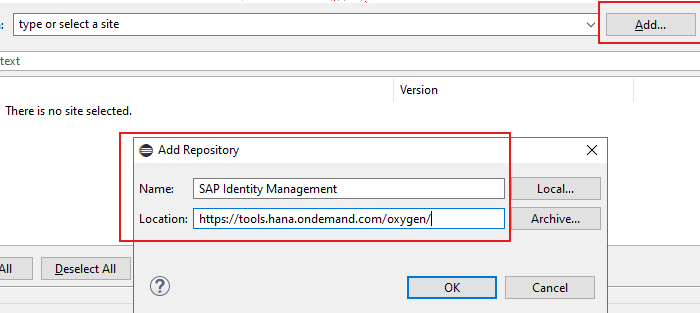
Add a new respority with https://tools.hana.ondemand.com/oxygen/ link as mentioned below:
Check SAP Identity Management Studio and click Next
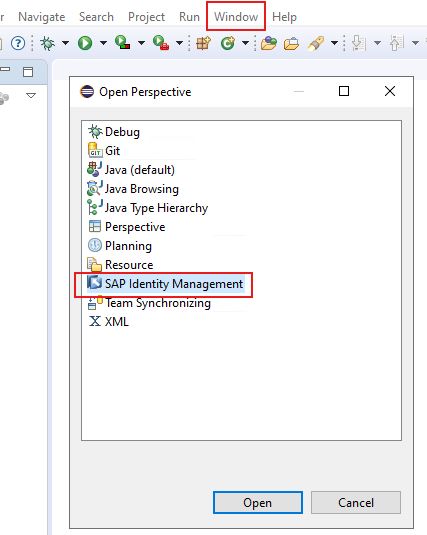
Now, goto Window > SAP Identity Management
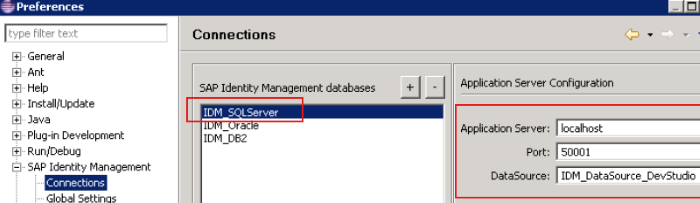
Add the following connection to the Developer studio:
- localhost
- 50001
- IDM_DataSource_DevStudio
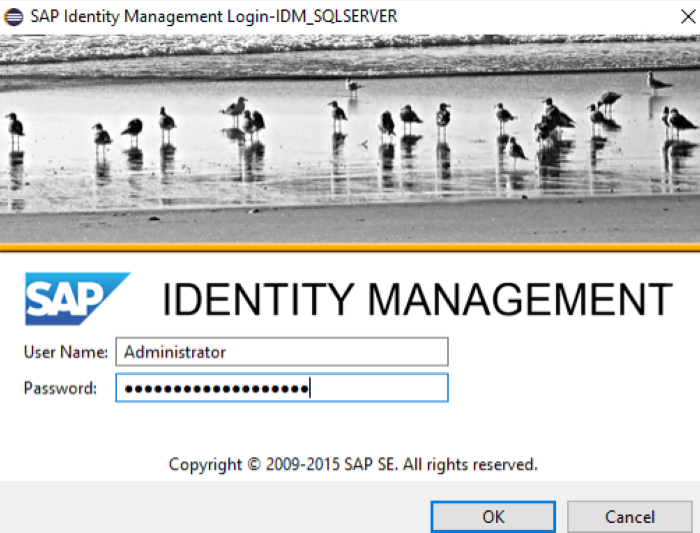
And login with Administrator credentials
Add new Identity Store as mentioned below:

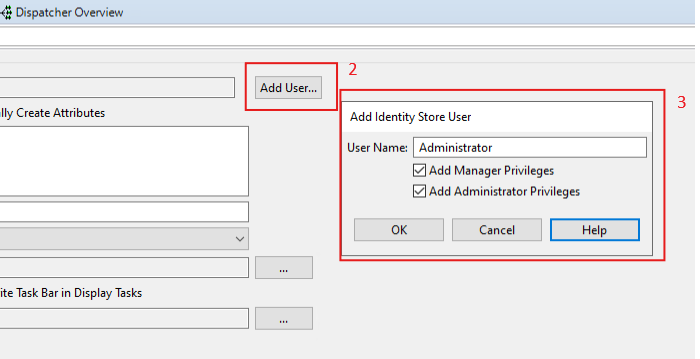
Add Administrator user to the Identity Store
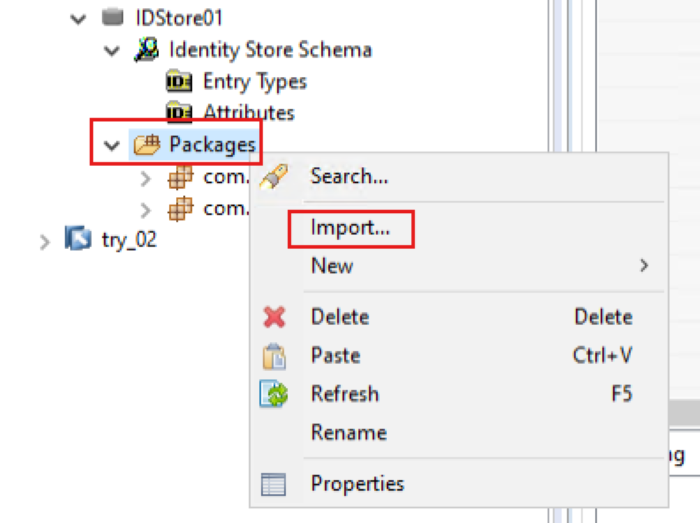
Import packages:
First unpack ICCORE08_36-80000538.SAR
PS C:\INSTALL_MEDIA> .\sapcar.EXE -xvf .\ICCORE08_36-80000538.SAR -R .\ICORE\Then import packages from ..ICCORE\ConfigurationPackages as mentioned below:
Assign following roles to the Administrator

9. Starting the IDM
9.1. services.msc
Make sure these services.msc are running:
- SAPNW7_00
- SAPNw7_01
9.2. sapmmc
Ensure that the NW7 is green, as shown below:
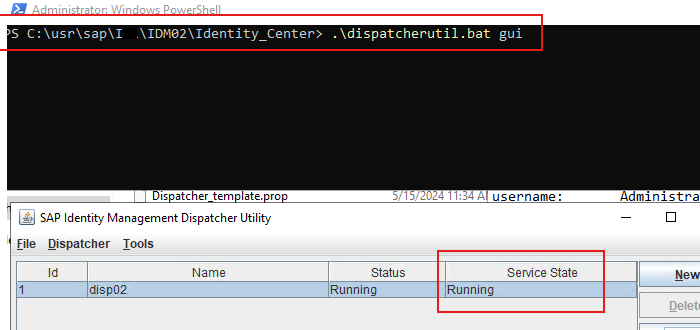
9.3. dispatcherutil.bat
Ensure that the SAP IDM Dispatcher Utility is up and running, as shown below:
9.4. Eclipse
First, always run Eclipse as an Administrator
And login with Administrator credentials
9.5. Browse
Browse the following URLs according to your need:
- http://saplocalhost:50000/nwa
- http://saplocalhost:50000/idm
- http://saplocalhost:50000/idm/admin
- http://saplocalhost:50000/useradmin