In this OpenID Connect tutorial, I’ll explain what OIDC is and show you a basic example using Keycloak.
Level
- Beginner friendly
- Basic Linux knowledge is helpful, as this tutorial uses a Linux OS.
Tech Stack
The tech stack used for this article includes:
- RHEL
- Ubuntu
- Keycloak
- Docker
- WordPress
- Flask
- cURL
- HTML/CSS & JS
1. What is OIDC?
- The OIDC provides an identity layer on top of OAuth 2.0
- Designed for user authentication
- For instance, web-based single sign-on (SSO) services such as Google Sign-In and Log In with Paypal are based on the OIDC protocol.
- Consequently, it has become one of the most widely deployed SSO protocols on the web [FeKS17].
2. OIDC Flow
There are three type of OIDC flows:
- Authorization Code Flow
- Implicit Flow
- Hybrid Flow
Through out this post, I'll be only covering Authorization Code Flow.
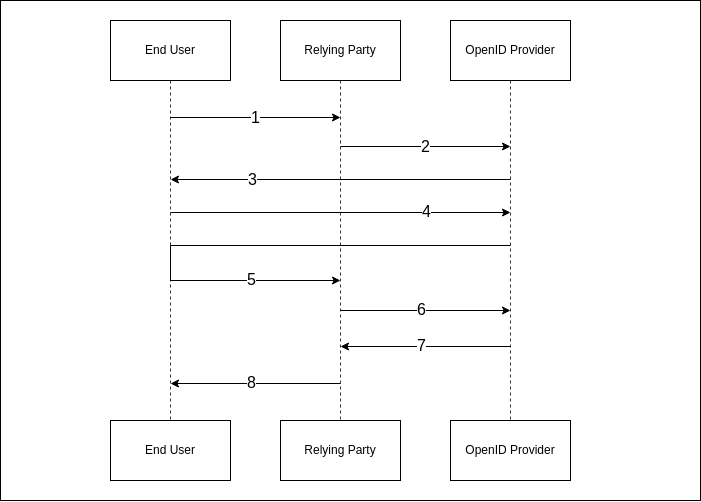
From the diagram:
- The user tries to access application
- The user is redirected to OpenID Provider with an authentication request
- The OpenID Provider asks user for authentication
- The user authenticates and the OpenID Provider creates/updates session
- The user's browser is redirected back to the application with authorization code
- The application sends
token requestto the OpenID provider with the authorization code - The OpenID Provider sends ID token, access token, and refresh token
- Finally, the user can access the application
3. Keycloak
Let's begin by adding the user in docker group:
$ sudo usermod -aG docker ${USER}3.1. Start Keycloak
$ docker run -p 8080:8080 \
-e KC_BOOTSTRAP_ADMIN_USERNAME=admin \
-e KC_BOOTSTRAP_ADMIN_PASSWORD=admin \
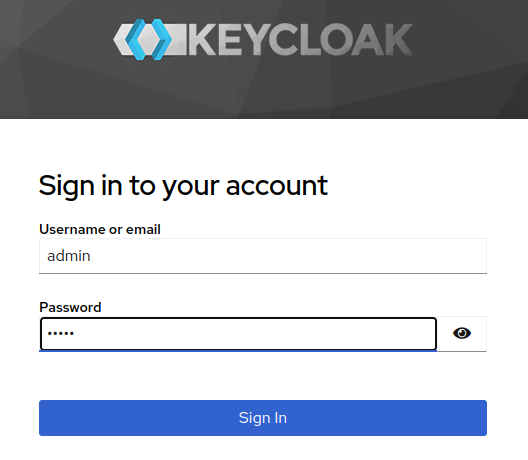
quay.io/keycloak/keycloak:26.1.0Log in to the Admin Console: localhost:8080
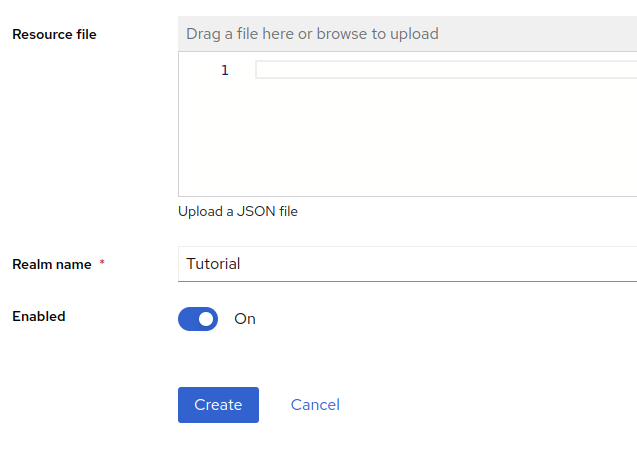
3.2. Create a realm
In Keycloak, a realm manages a set of users, credentials, roles, and groups.
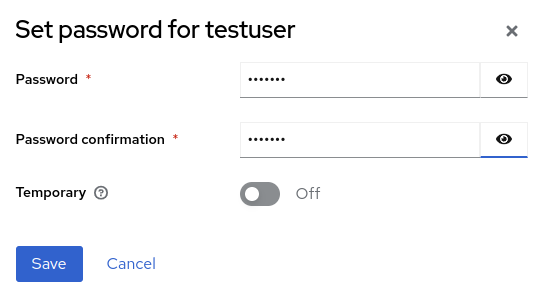
3.3. Create user
Then, within the realm, create a testuser

And set password
4. WordPress
In this section, we will integrate WordPress in Keycloak, allowing users to log in using OIDC.
4.1. Create a client
Create a client in Keycloak as mentioned in the image below:
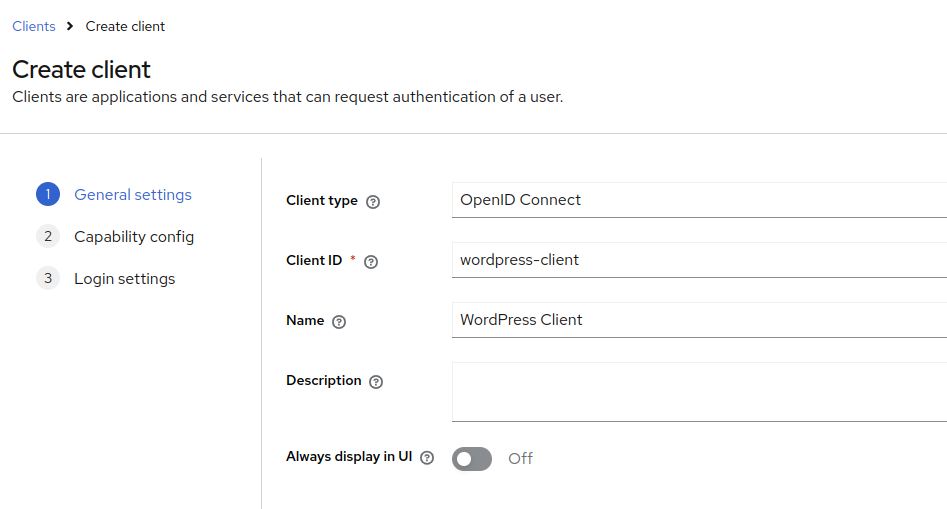
Note: In Keycloak, clients are applications or services.
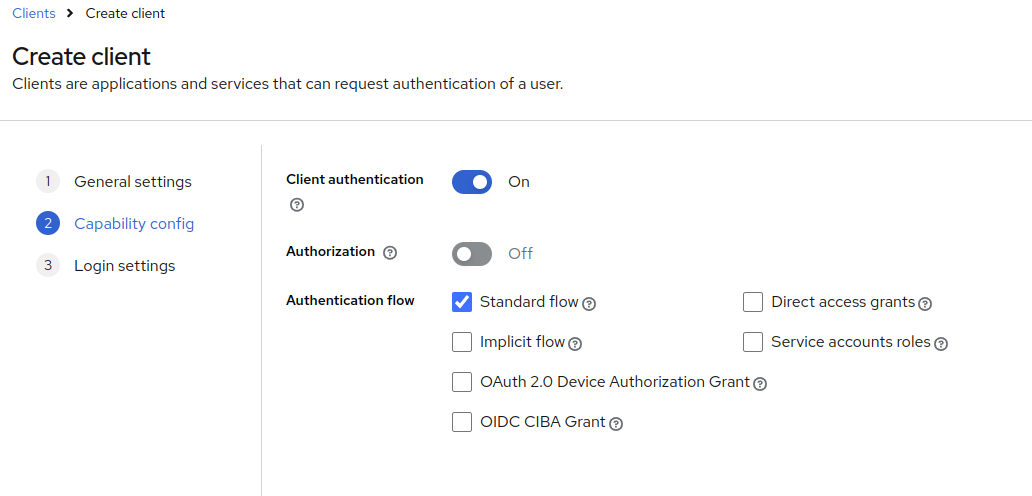
Click Next
Turn on Client authentication
- On means confidential access type
- Off means public access type
Now, select Standard Flow as Authentication flow. This enables support of Authorization Code Flow for this client
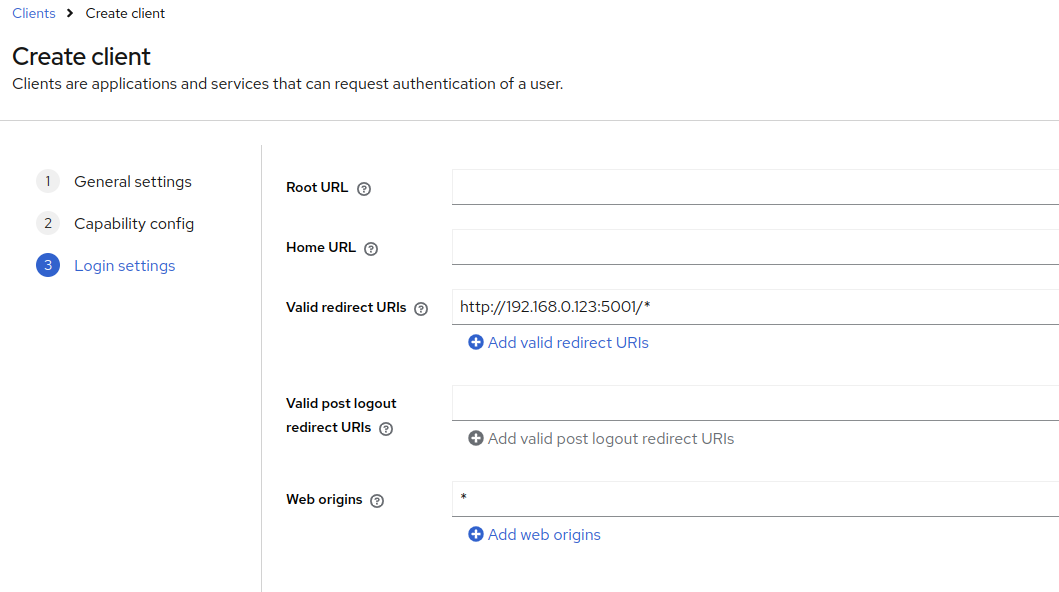
Here, you can leave Root and Home URL empty. But provide a valid redirect URIs.
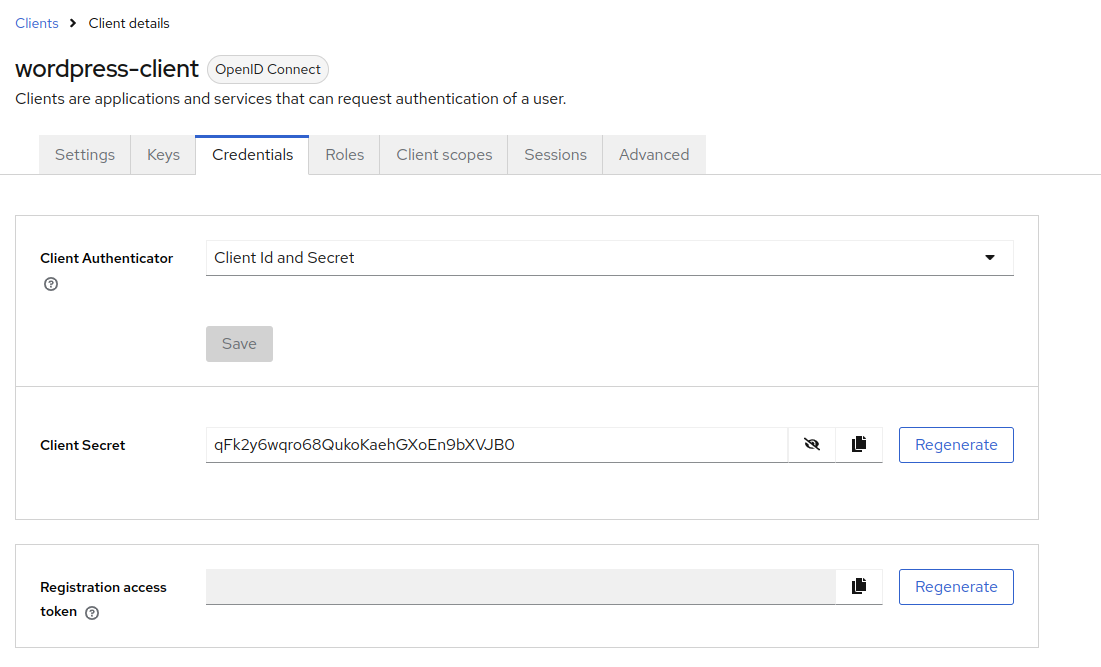
Go to to the Credentials tab, and copy Client Secret for later use.
That's all for Keyclock client setup. Now, let's setup a WordPress website via Docker.
4.2. Docker compose
Create docker-compose.yaml inside wordpress folder:
services:
  wordpress:
    image: wordpress:latest
    container_name: wpTutorial
    restart: always
    ports:
      - "5001:80"
    environment:
      WORDPRESS_DB_HOST: dbWP:3306
      WORDPRESS_DB_NAME: wpTutorial
      WORDPRESS_DB_USER: root
      WORDPRESS_DB_PASSWORD: s3crets
    depends_on:
      - db

  db:
    image: mysql:5.7
    container_name: dbWP
    restart: always
    environment:
      MYSQL_ROOT_PASSWORD: s3crets
      MYSQL_DATABASE: wpTutorial
    volumes:
      - db_data:/var/lib/mysql

volumes:
  db_data:
driver: local- This Docker compose file defines two servcies i.e., WordPress and MySQL
- The WordPress website can be browsed from http://192.168.0.123:5001 (replace with your IP)
Now, run docker compose:
docker compose up -d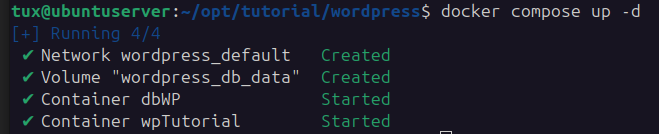
4.3. WordPress setup
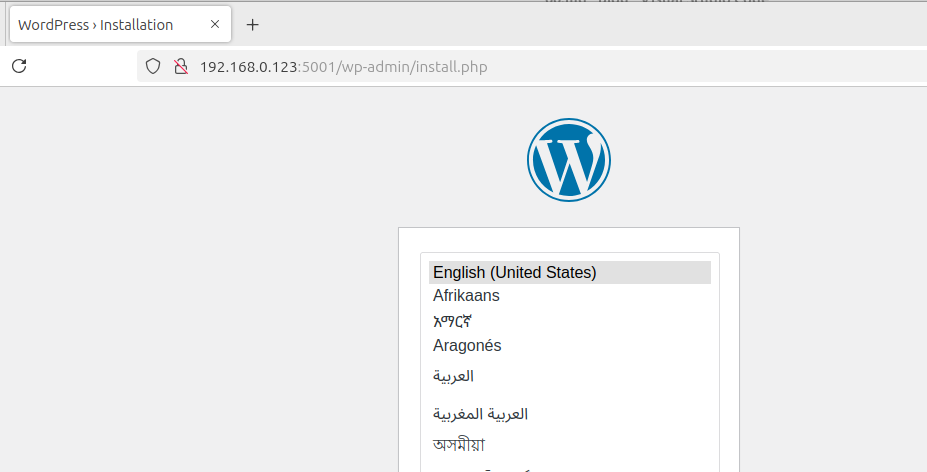
Browse http://192.168.0.123:5001, and run the WordPress setup. The objective of this section is to enable Keycloak's OIDC functionality for WordPress users.
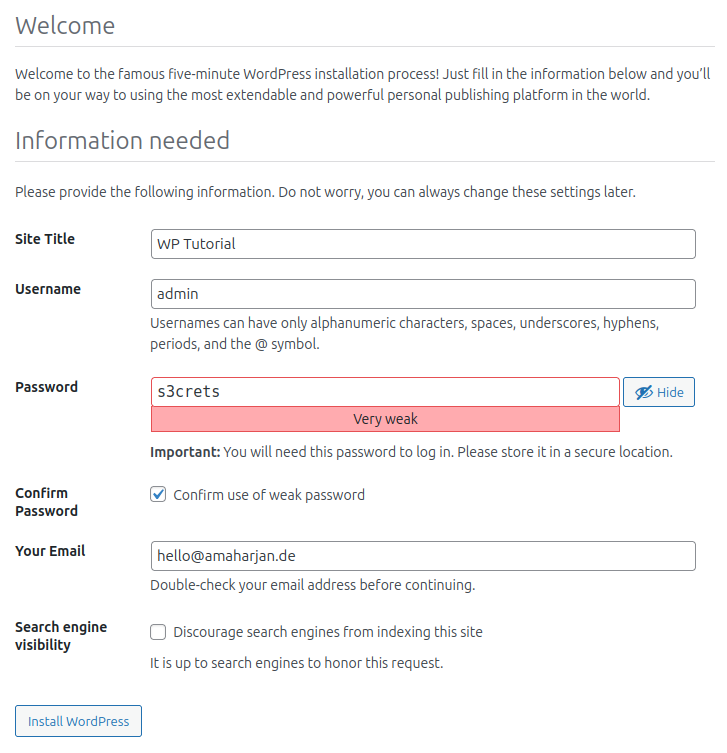
Provide site title, username, strong password, and email
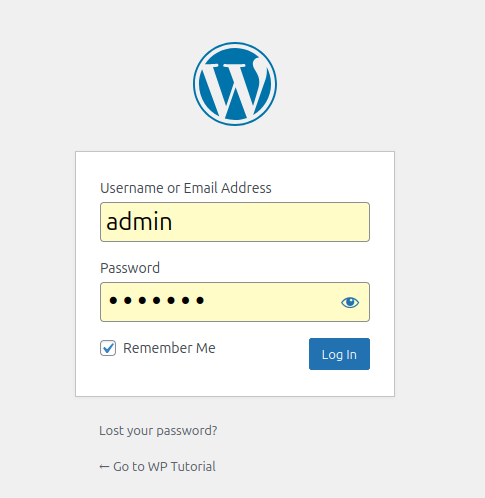
Login as admin on http://192.168.0.123:5001/wp-admin/
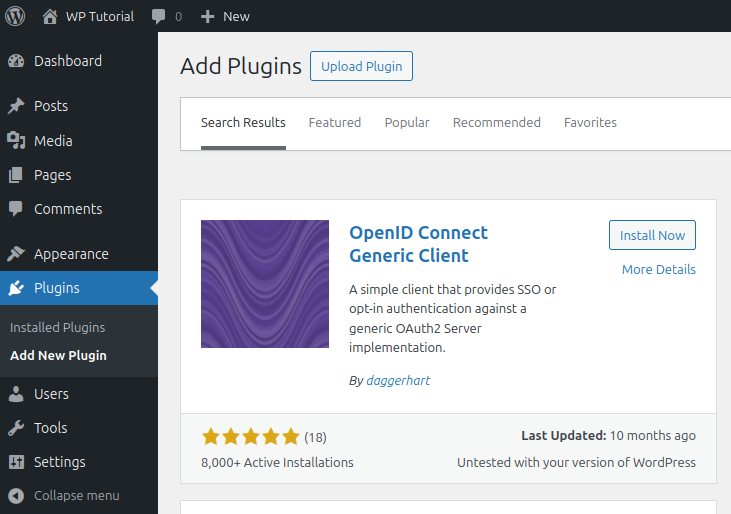
4.4. WordPress OIDC plugin
Install and active the plugin called OpenID Connect Generic Client by daggerhart
Go to http://KEYCLOAK_IP:PORT/realms/YOUR_REALM/.well-known/openid-configuration
Or, go to Keycloak admin page > Real settings > and click on OpenID Endpoint Configuration as shown below:
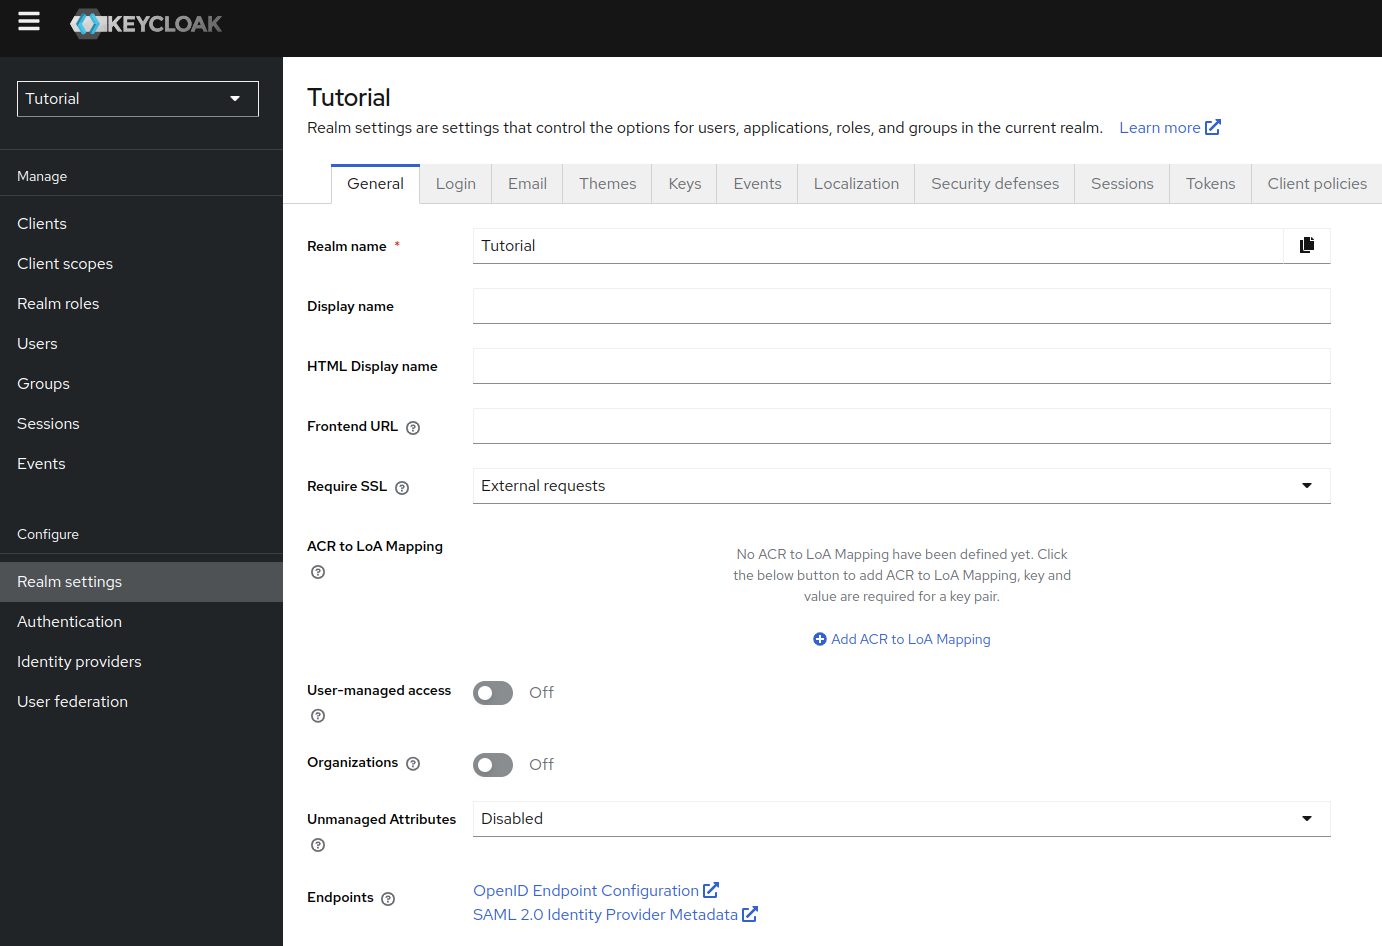
As this will be important to fill out the OpenID Connect Client settings.
Goto Settings > OpenID Connect Client settings, and fill out inputs as mentioned below:
| Key | Value |
|---|---|
| Login Type | OpenID Connect button on login form |
| Client ID | wordpress-client |
| Client Secret Key | qFk2y6wqro68QukoKaehGXoEn9bXVJB0 |
| OpenID Scope | email profile openid offline_access |
| Login Endpoint URL | http://192.168.0.123:8080/realms/Tutorial/protocol/openid-connect/auth |
| Userinfo Endpoint URL | http://192.168.0.123:8080/realms/Tutorial/protocol/openid-connect/userinfo |
| Token Validation Endpoint URL | http://192.168.0.123:8080/realms/Tutorial/protocol/openid-connect/token |
| End Session Endpoint URL | http://192.168.0.123:8080/realms/Tutorial/protocol/openid-connect/logout |
| ACR values | leave this empty |
| Identity Key | preferred_username |
| Disable SSL Verify | leave this empty |
| HTTP Request Timeout | 5 |
| Nickname Key | preferred_username |
| Email Formatting | {email} |
| Display Name Formatting | leave this empty |
| Identify with User Name | leave this empty |
| State time limit | 180 |
| Enable Refresh Token | enabled |
| Link Existing Users | leave this empty |
| Create user if does not exist | enabled |
| Redirect Back to Origin Page | leave this empty |
| Redirect to the login screen when session is expired | enabled |
| Enforce Privacy | leave this empty |
| Alternate Redirect URI | leave this empty |
| Enable Logging | leave this empty |
| Log Limit | 1000 |
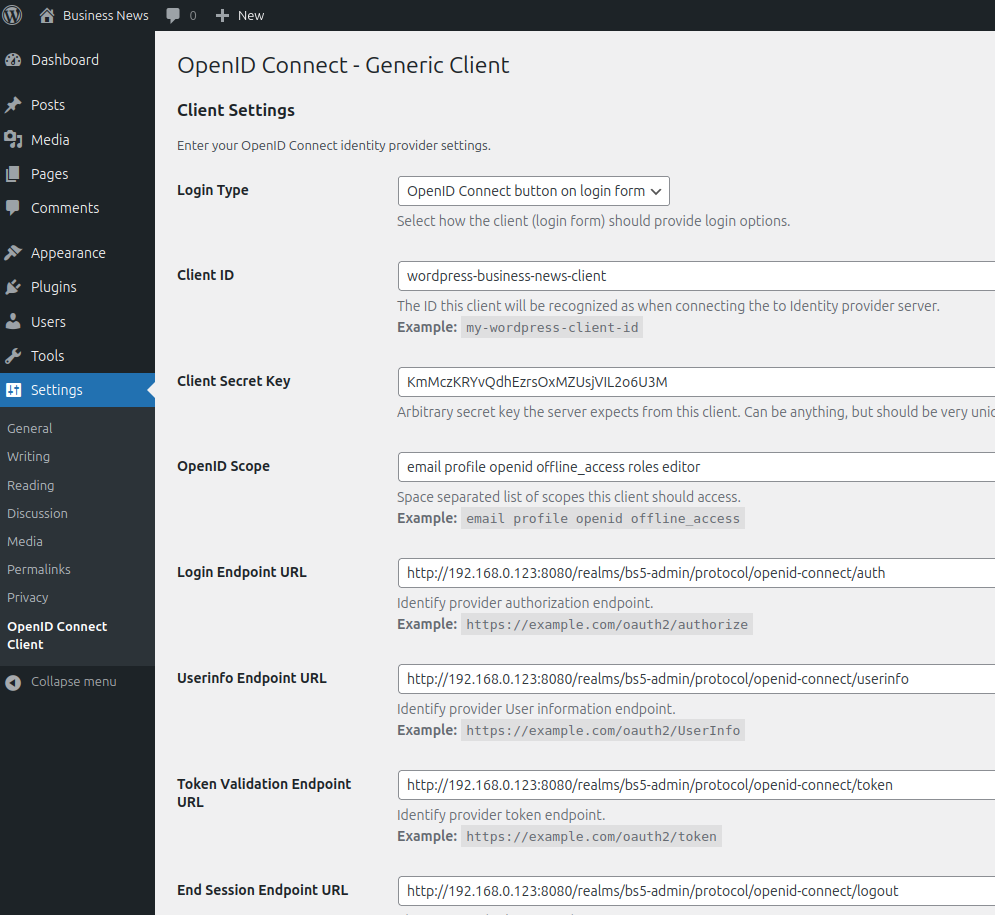
Save changes.
4.5. Login with OIDC
Browse http://192.168.0.123:5001/wp-admin
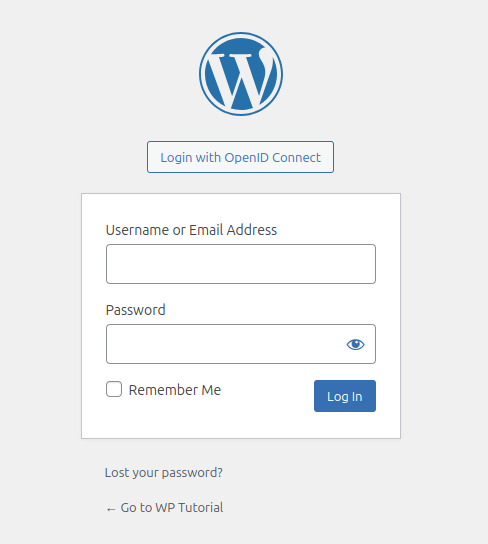
Click on Login with OpenID Connect
Sign with Keycloak user testuser and password s3crets

5. Flask
Finally, we will integrate a Flask app in Keycloak, allowing users to login using OIDC.
5.1. Create a client
Create a Keycloak client flask-client as mentioned below:
- Client ID: flask-client
- Name: Flask project client
- Client authentication: On
- Authorization: Off
- Authentication flow
- Standard flow: Enabled
- Direct access grants: Disabled
- Root URL:
http://192.168.0.123:5002 - Home URL: not required
- Valid redirect URIs:
http://192.168.0.123:5002/* - Valid post logout redirect URIs: not required
- Web origins: *
Click Save.
Make a note of client secrets for later use.
5.2. Flask
Create flask-project
mkdir flask-project
cd flask-project
A. docker-compose.yaml
Create docker-compose.yaml
touch docker-compose.yamlPaste the following yaml:
services:
  web:
    build: .
    ports:
      - "5002:5000"
    develop:
      watch:
        - action: sync
          path: .
          target: /code
B. Dockerfile
Create Dockerfile
touch DockerfilePaste:
WORKDIR /code
ENV FLASK_APP=app.py
ENV FLASK_RUN_HOST=0.0.0.0
RUN apk add --no-cache gcc musl-dev linux-headers
COPY requirements.txt requirements.txt
RUN pip install -r requirements.txt
EXPOSE 5000
COPY . .
CMD ["flask", "run", "--debug"]
C. requirements.txt
Create requirements.txt with the following content:
flask
requests
D. index.html
Create index.html inside templates folder. This html acts as landing page for our application.
mkdir templates
touch index.html
<html>
<body>
<p>
Welcome, {{ user_info_obj.preferred_username }}
</p>
<hr>
<p>{{ user_info_obj.email }}</p>
<p>{{ user_info_obj.email_verified }}</p>
<p>{{ user_info_obj.upn }}</p>
<p>
<a href="/logout">Logout</a>
</p>
</body>
</html>E. app.py
Create app.py inside flask-project
pwd

/home/tux/opt/tutorial/flask-project
touch app.pyPaste the following code:
import os
import requests
from flask import Flask, redirect, request, session, url_for, render_template

app = Flask(__name__)
app.secret_key = os.urandom(24)

# Keycloak settings
KEYCLOAK_SERVER = 'http://192.168.0.123:8080'
REALM_NAME = 'Tutorial'
CLIENT_ID = 'flask-client'
CLIENT_SECRET = 'yakhrUZBx8aIzDPH2FqiRBE286EqYEzm'
REDIRECT_URI = 'http://192.168.0.123:5002/callback'

# Keycloak OIDC endpoints
AUTHORIZATION_URL = f"{KEYCLOAK_SERVER}/realms/{REALM_NAME}/protocol/openid-connect/auth"
TOKEN_URL = f"{KEYCLOAK_SERVER}/realms/{REALM_NAME}/protocol/openid-connect/token"
USERINFO_URL = f"{KEYCLOAK_SERVER}/realms/{REALM_NAME}/protocol/openid-connect/userinfo"

@app.route('/')
def home():
    '''
    '''
    if 'user_info' in session:
        user_info_obj = session['user_info']
        return render_template('index.html', user_info_obj=user_info_obj)

    return redirect(url_for('login'))

@app.route('/login')
def login():
    '''
    Redirect to Keycloak login page
    '''
    auth_url = f"{AUTHORIZATION_URL}?client_id={CLIENT_ID}&response_type=code&scope=openid&redirect_uri={REDIRECT_URI}"
    return redirect(auth_url)

@app.route('/callback')
def callback():
    '''
    '''
    # Get authorization code from Keycloak
    code = request.args.get('code')

    # Request access token using the code
    token_data = {
        'grant_type': 'authorization_code',
        'code': code,
        'redirect_uri': REDIRECT_URI,
        'client_id': CLIENT_ID,
        'client_secret': CLIENT_SECRET
    }

    response = requests.post(TOKEN_URL, data=token_data)
    response_data = response.json()

    if 'access_token' not in response_data:
        return "Error: No access token found.", 400

    access_token = response_data['access_token']

    # Fetch user info from Keycloak
    user_info_response = requests.get(
        USERINFO_URL,
        headers={'Authorization': f'Bearer {access_token}'}
    )

    if user_info_response.status_code != 200:
        return "Error: Could not retrieve user info.", 400
    user_info = user_info_response.json()

    # Store user info in session
    session['user_info'] = user_info

    return redirect(url_for('home'))

@app.route('/logout')
def logout():
    session.pop('user_info', None)
    logout_url = f"{KEYCLOAK_SERVER}/realms/{REALM_NAME}/protocol/openid-connect/logout"
    return redirect(logout_url)
Here's a concise summary of the source code:
- A Flask web app integrates with Keycloak for authentication using OpenID Connect (OIDC).
- Users are redirected to Keycloak for login.
- After successful login, Keycloak sends back a code, which the app exchanges for an access token.
- The app then fetches the user’s profile info and stores it in the session.
- If the user is already logged in, their info is displayed on the homepage.
- A logout route clears the session and redirects the user to Keycloak's logout endpoint.
Moreover, the flask-project structure should look like this:
flask-project/
├── Dockerfile
├── app.py
├── docker-compose.yaml
├── requirements.txt
└── templates
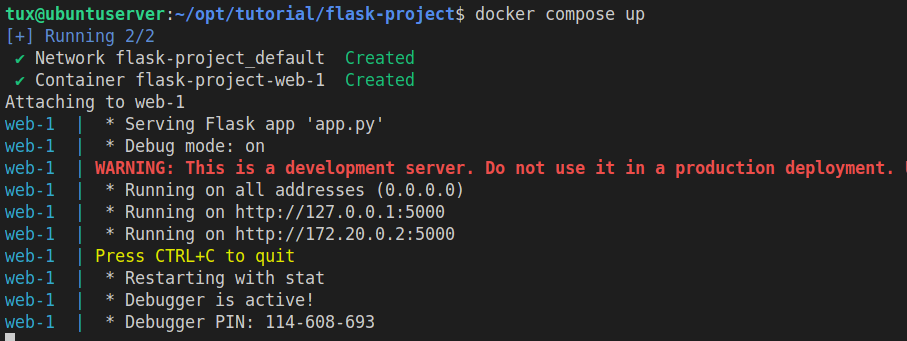
└── index.htmlNow, let's run the docker
docker compose upOutput:
Browse http://192.168.0.123:5002/
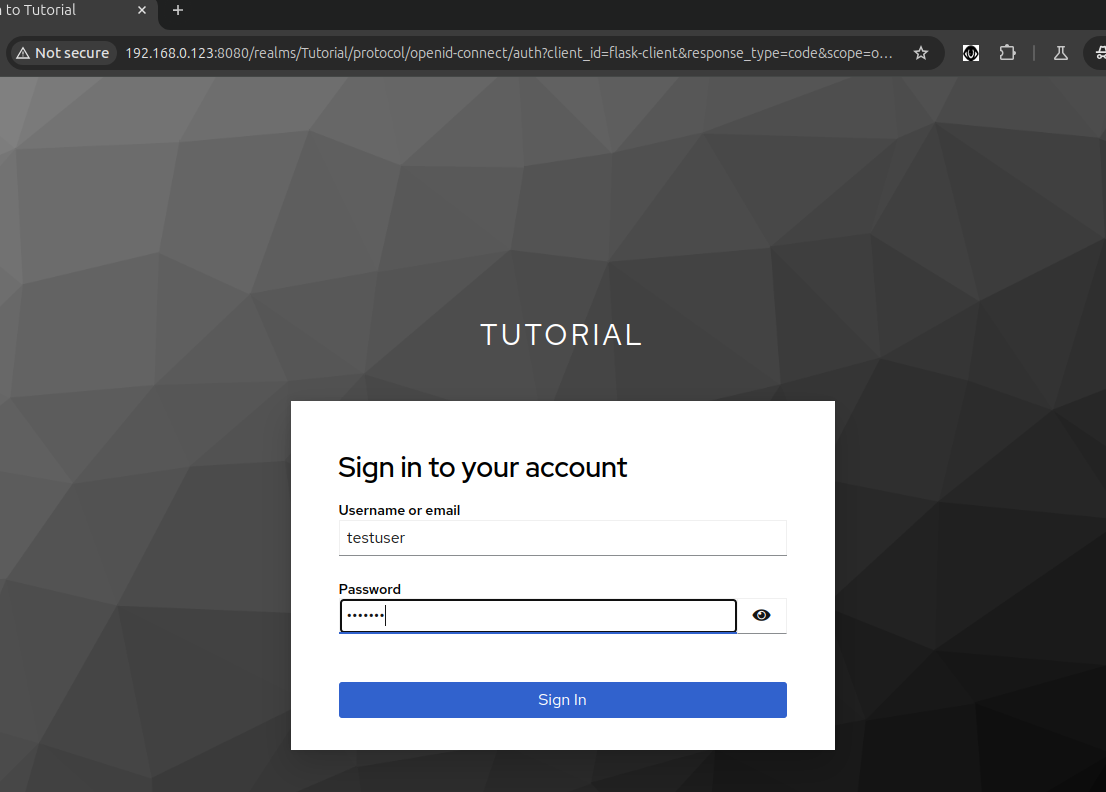
As soon as you enter http://192.168.0.123:5002/, the browser address gets redirect to http://192.168.0.123:8080/realms/Tutorial/protocol/openid-connect/auth?client_id=flask-client&response_type=code&scope=openid&redirect_uri=http://192.168.0.123:5002/callback with Keycloak login page.
Let's decode this:
| URL / URL fragments | Description |
|---|---|
http://192.168.0.123:8080/realms/Tutorial/protocol/openid-connect/auth |
AUTHORIZATION_URL |
?client_id=flask-client |
Client that we've created on the Keycloak |
&response_type=code |
Response type is code |
&scope=openid |
Scope is openid |
&redirect_uri=http://192.168.0.123:5002/callback |
This is redirect URI |
Now, Login with Keycloak user's credentials.
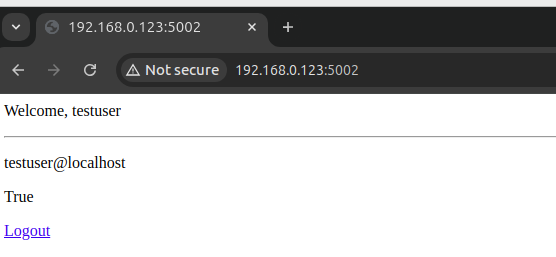
With the correct credentials, you'll be granted access to the flask-client application.
And logout shall end the session:

Voila! We’ve now covered a lot about OIDC, including some practical examples. You can continue exploring more on this website or check out my recommendations below.
I hope you enjoyed the article! If you have any feedback, suggestions for improvement, or would like to collaborate, feel free to reach out — you can email me at hello@amaharjan.de.
Articles recommended by the author
References
- [FeKS17] D. Fett, R. Küsters, and G. Schmitz, “The Web SSO Standard OpenID Connect: In-depth Formal Security Analysis and Security Guidelines,” in 2017 IEEE 30th Computer Security Foundations Symposium (CSF), 2017, pp. 189–202. doi: 10.1109/CSF.2017.20.